Introduction
Still life painting became a stand-alone art genre in seventeenth-century Holland. From then on, ateliers and academies in Europe and Russia began teaching still life painting, making it part of the formal fine art education. Still life drawing affords the opportunity to learn how to render form and spatial relationship within a small space. Form involves the shape and texture of an object. Spatial relationship indicates the positioning of an object, in relation to the other objects on their left, right, front, and back.
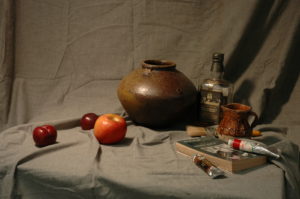
Setting up for still life drawing
Step 1 – Block in
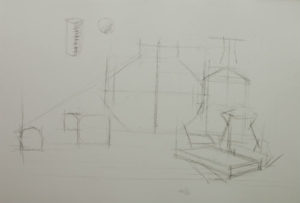
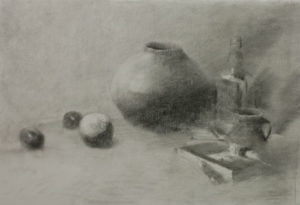
To start a still life drawing, first observe all the objects as a whole. Define the placement of each object by indicating the highest and lowest points as well as the left and right ends. Connect these points with straight lines. Examine the placements and the relationship between them. Does the size and shape of an object appear to be correct? Is the position accurate?
Next, use straight lines to define the objects and find the horizontal position of each object on the table. The block-in defines the position of the object and the relationship with the other objects. This is what we call composition. This step is extremely important, as the concept and skill are further applied to figurative and landscape paintings.
Then further define the form of each object. It’s important to note that you should stick to straight lines at this point. Do not use curved lines. Create an axis as reference line in the center of cylindrical objects. Make sure to capture the correct perspective when drawing rectangular objects (such as the book in the drawing). If you have not practiced drawing basic shapes such as cylinder, cube and sphere, it’s advisable that you spend some time drawing and studying basic shapes. It will help immensely rendering correct shape when drawing more complicated objects.
Step 2 – Further define the parts
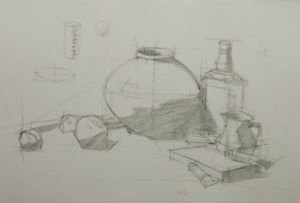
To start a still life drawing, first observe all the objects as a whole. Define the placement of each object by indicating the highest and lowest points as well as the left and right ends. Connect these points with straight lines. Examine the placements and the relationship between them. Does the size and shape of an object appear to be correct? Is the position accurate?
Next, use straight lines to define the objects and find the horizontal position of each object on the table. The block-in defines the position of the object and the relationship with the other objects. This is what we call composition. This step is extremely important, as the concept and skill are further applied to figurative and landscape paintings.
Then further define the form of each object. It’s important to note that you should stick to straight lines at this point. Do not use curved lines. Create an axis as reference line in the center of cylindrical objects. Make sure to capture the correct perspective when drawing rectangular objects (such as the book in the drawing). If you have not practiced drawing basic shapes such as cylinder, cube and sphere, it’s advisable that you spend some time drawing and studying basic shapes. It will help immensely rendering correct shape when drawing more complicated objects.
Step 3 – Add value
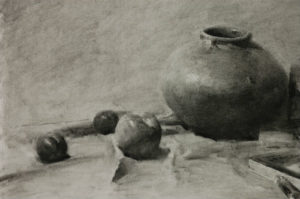
Start from the boundary between dark and light. Reinforce the dark area and then work on the middle value. Pay attention to the value gradation between dark and light and the relationship between the dark area, shadow and backdrop for each object. Use soft and hard edges to articulate this relationship. Remember to ignore the edge of the shadow and details during this stage. The purpose of this stage is to establish value relationship of key components of the drawing.
Step 4 – Creating details
Having convincing details is one of the characteristics of realistic painting and what makes representational art resonating. There is a Chinese saying, “dotting the eyes of a dragon,” which illustrates the importance of believable and well-done details that make a drawing or painting come to life.
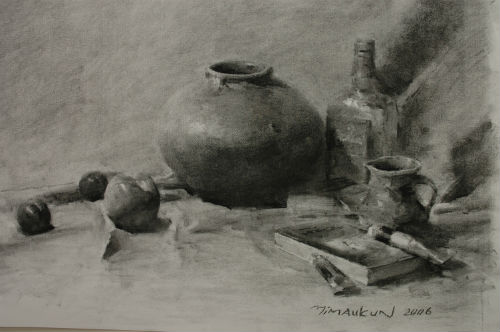
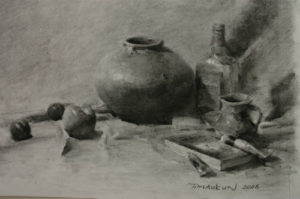
Creating details requires thorough observation, proper use of different tools and various drawing techniques to render the unique texture of each object such as the transparency of the glass, the shine of the oil paint tube, solidity of the pottery and freshness and juiciness of the plum. The different textures create an interesting dynamic in the drawing which is part of key still life aesthetics.
In terms of tools, different tools and materials create different effects. This is a charcoal drawing on a drawing paper, so the middle value and value gradation are created using a combination of hatching, blending, and subtracting with soft and regular erasers.
Creating details is not a process of merely addition. It’s a process of iteration, with addition and subtraction. It’s a process of exploring and defining the dynamics and relationship between different shapes, textures using value, hard and soft edges, and different strokes.
Rendering spheres is challenging. The clay pot, apple and plums in the drawing have different surface textures and curvatures, and different drawing techniques and strokes should be applied. Pay careful attention to the reflection of the cloth and its effect on these objects. Rendering the cloth’s reflection and its softening effect on the edges of these objects is key to creating a sense of space and integrating these objects into their environment.
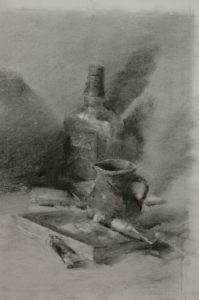
For the glass bottle, first the structure of it needs to be right. Pay attention to the symmetrical structure and make sure that the bottle is standing “upright.” The neck and mouth of the bottle are a cylinder and need to be rendered as such. Next, create transparency and highlights. The highlights cannot be the same bright, white highlights everywhere. There needs to be distinction and variation in the highlights, rendered with different strokes and rhythm.
Lastly, fine tune the spatial relationship between the fruits, the clay pot, and the oil paint tubes.
Step 5 – Finishing up
The drawing is nearly finished at this point. Double check the perspective of the table so that it looks flat as it extends into the background. In order to do this right, you need to pay attention to the following aspects: (1) value, (2) the pattern (folds) of the cloth, (3) the perspective of each object as it sits on the table, and (4) the shapes of the shadows.
For more information about still life drawing, please click here.


You are such a talented artist and art teacher. Thanks for all this valuable information.
Thank you Salman! We’re glad you found the information helpful.
This is Brady S commenting for points for this assignment.