How to do classical bust study – a step-by-step guide
Structure, proportion, and value, stage by stage
11 月 10, 2018
It seems that classical bust study is no longer offered in art programs and still life is the common entry level drawing class is drawing classes are offered at all. I seem to have lived under a rock for I have practiced drawing, including cast drawing, alongside my students for more than three decades.
Why do cast drawing? The clean and clear appearance of classical busts makes easier to study light, value and form. Classical bust study used to be an indispensable part of formal art education in ateliers and art academies prior to the rise of modernism. My solid training in classical bust study has benefited me throughout my painting career.
In 1978, after the Cultural Revolution, I visited alumni at the Guangzhou Fine Arts Academy. I ran into a retired art professor in the school. He asked me, “Mau-Kun Yim, you were the President of Academic Affairs of the Student Association. Do you have any theories why your class has so many outstanding graduates?” (There were more than ten renowned artists from my class such as Chen Yanning (https://en.wikipedia.org/wiki/Chen_Yanning), 張紹城,招熾挺, I replied, “Maybe it was because there was no education reform at the time, and we spent a solid four years on classical bust studies?”
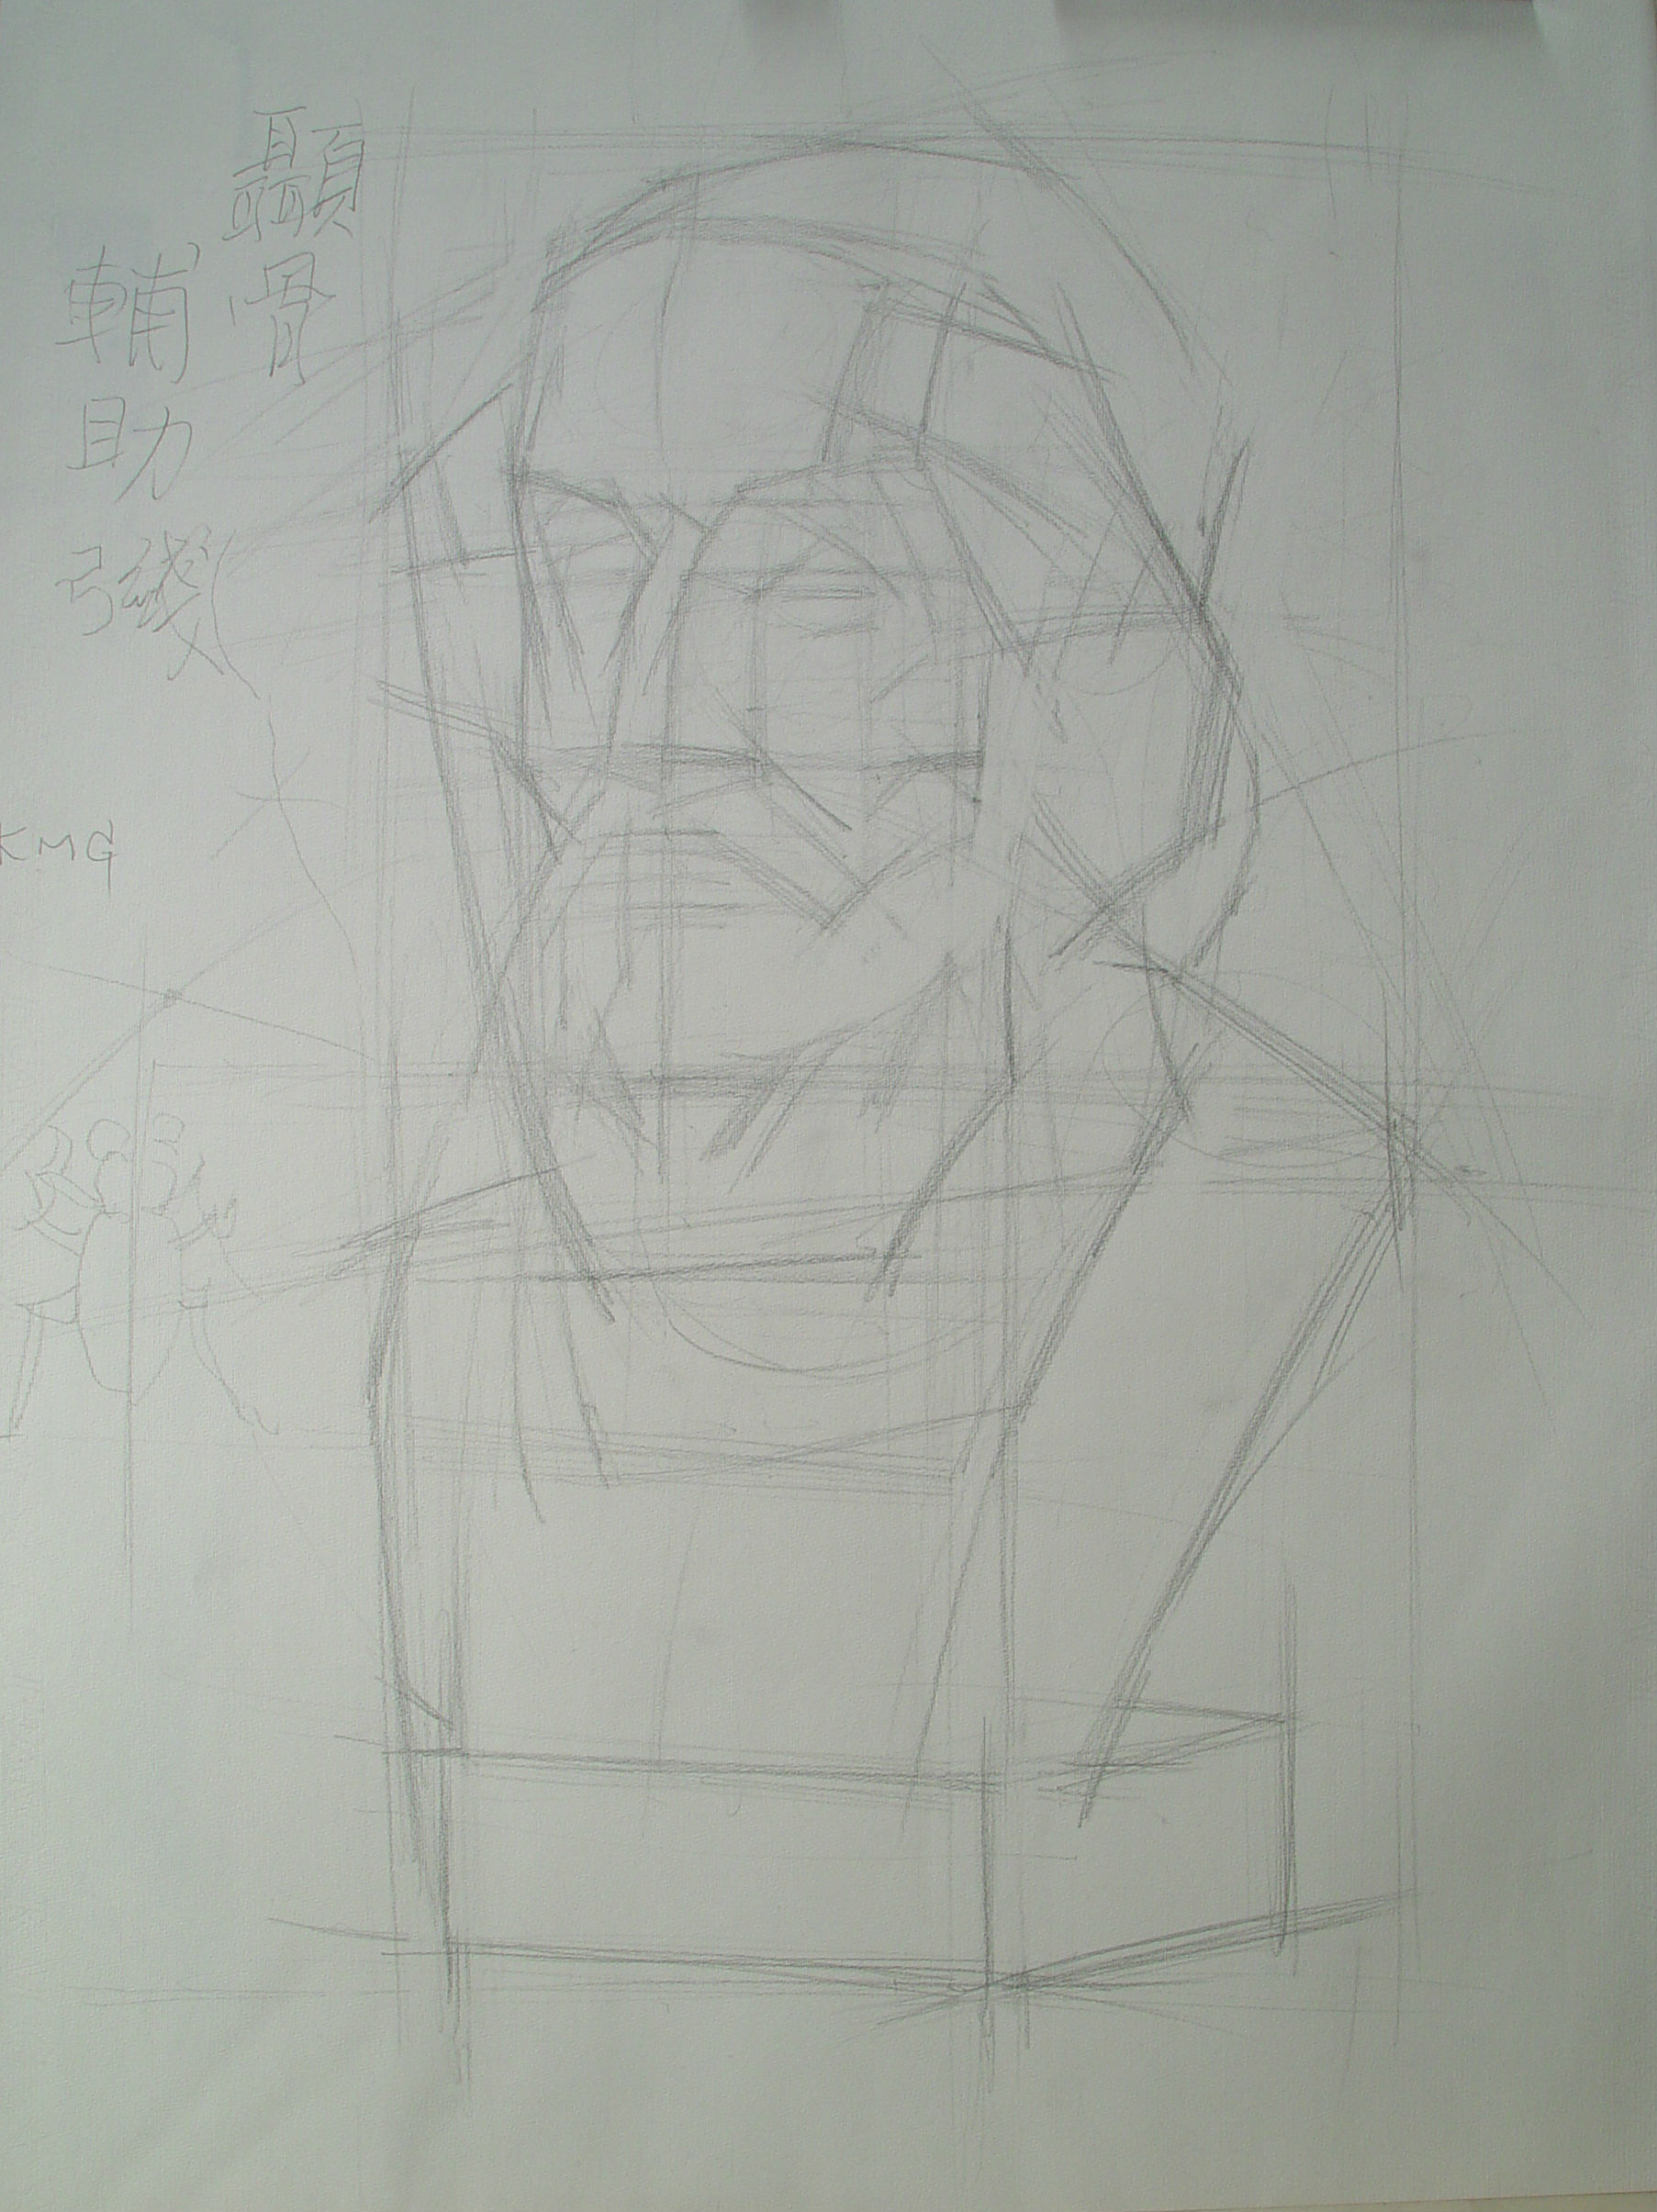
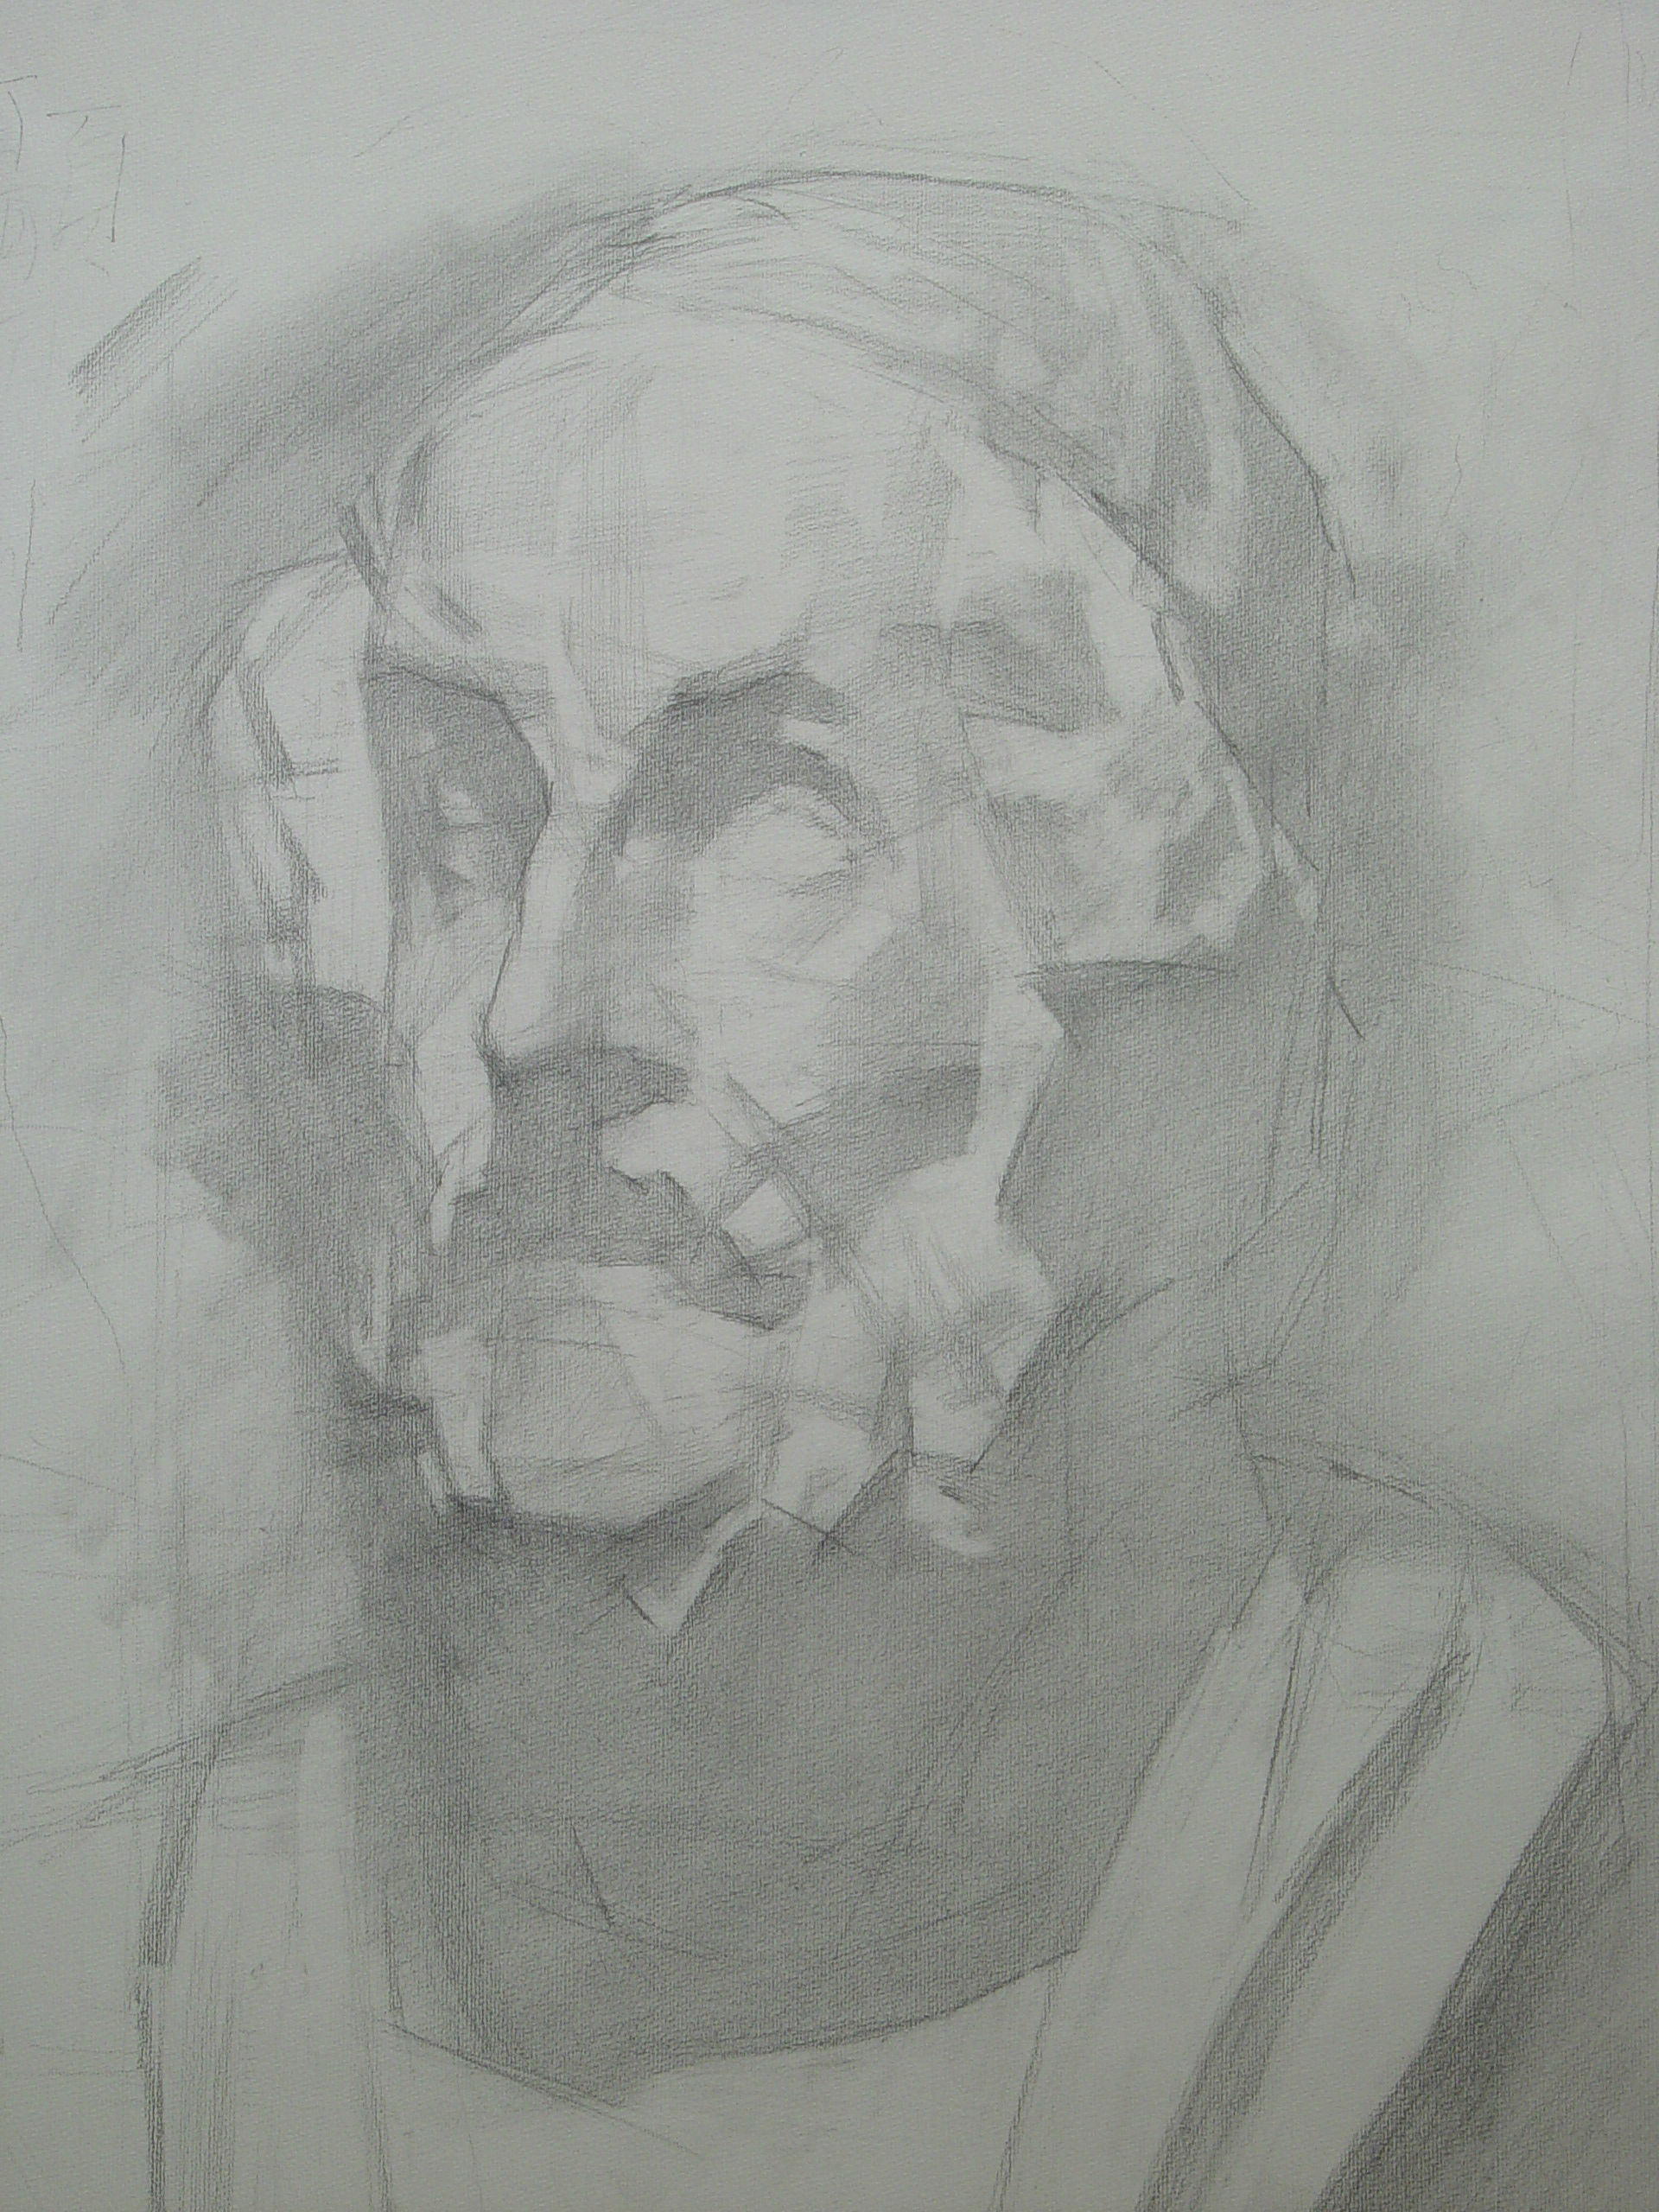
Step 1 – Block in
Classical bust study is the foundation of drawing. Its clean and clear state makes it easier to study light and value.
First, evaluate the position of the sculpture from every direction. Use reference lines to establish the positions of its top, middle and bottom areas. Find the center point of the sculpture (around the core shadow area under the chin), then locate the mid-point of the sculpture head (around the eyes). Divide the forehead into thirds, as well as the area between the eyebrows and the nose, and from the nose to the chin. Finally, block in the hair, mustache, chest, and base.
The most important point is to use straight lines at different angles to define or cut out the shapes. Omit curves and simplify the subject. This is the key to grasping the shape of the sculpture.
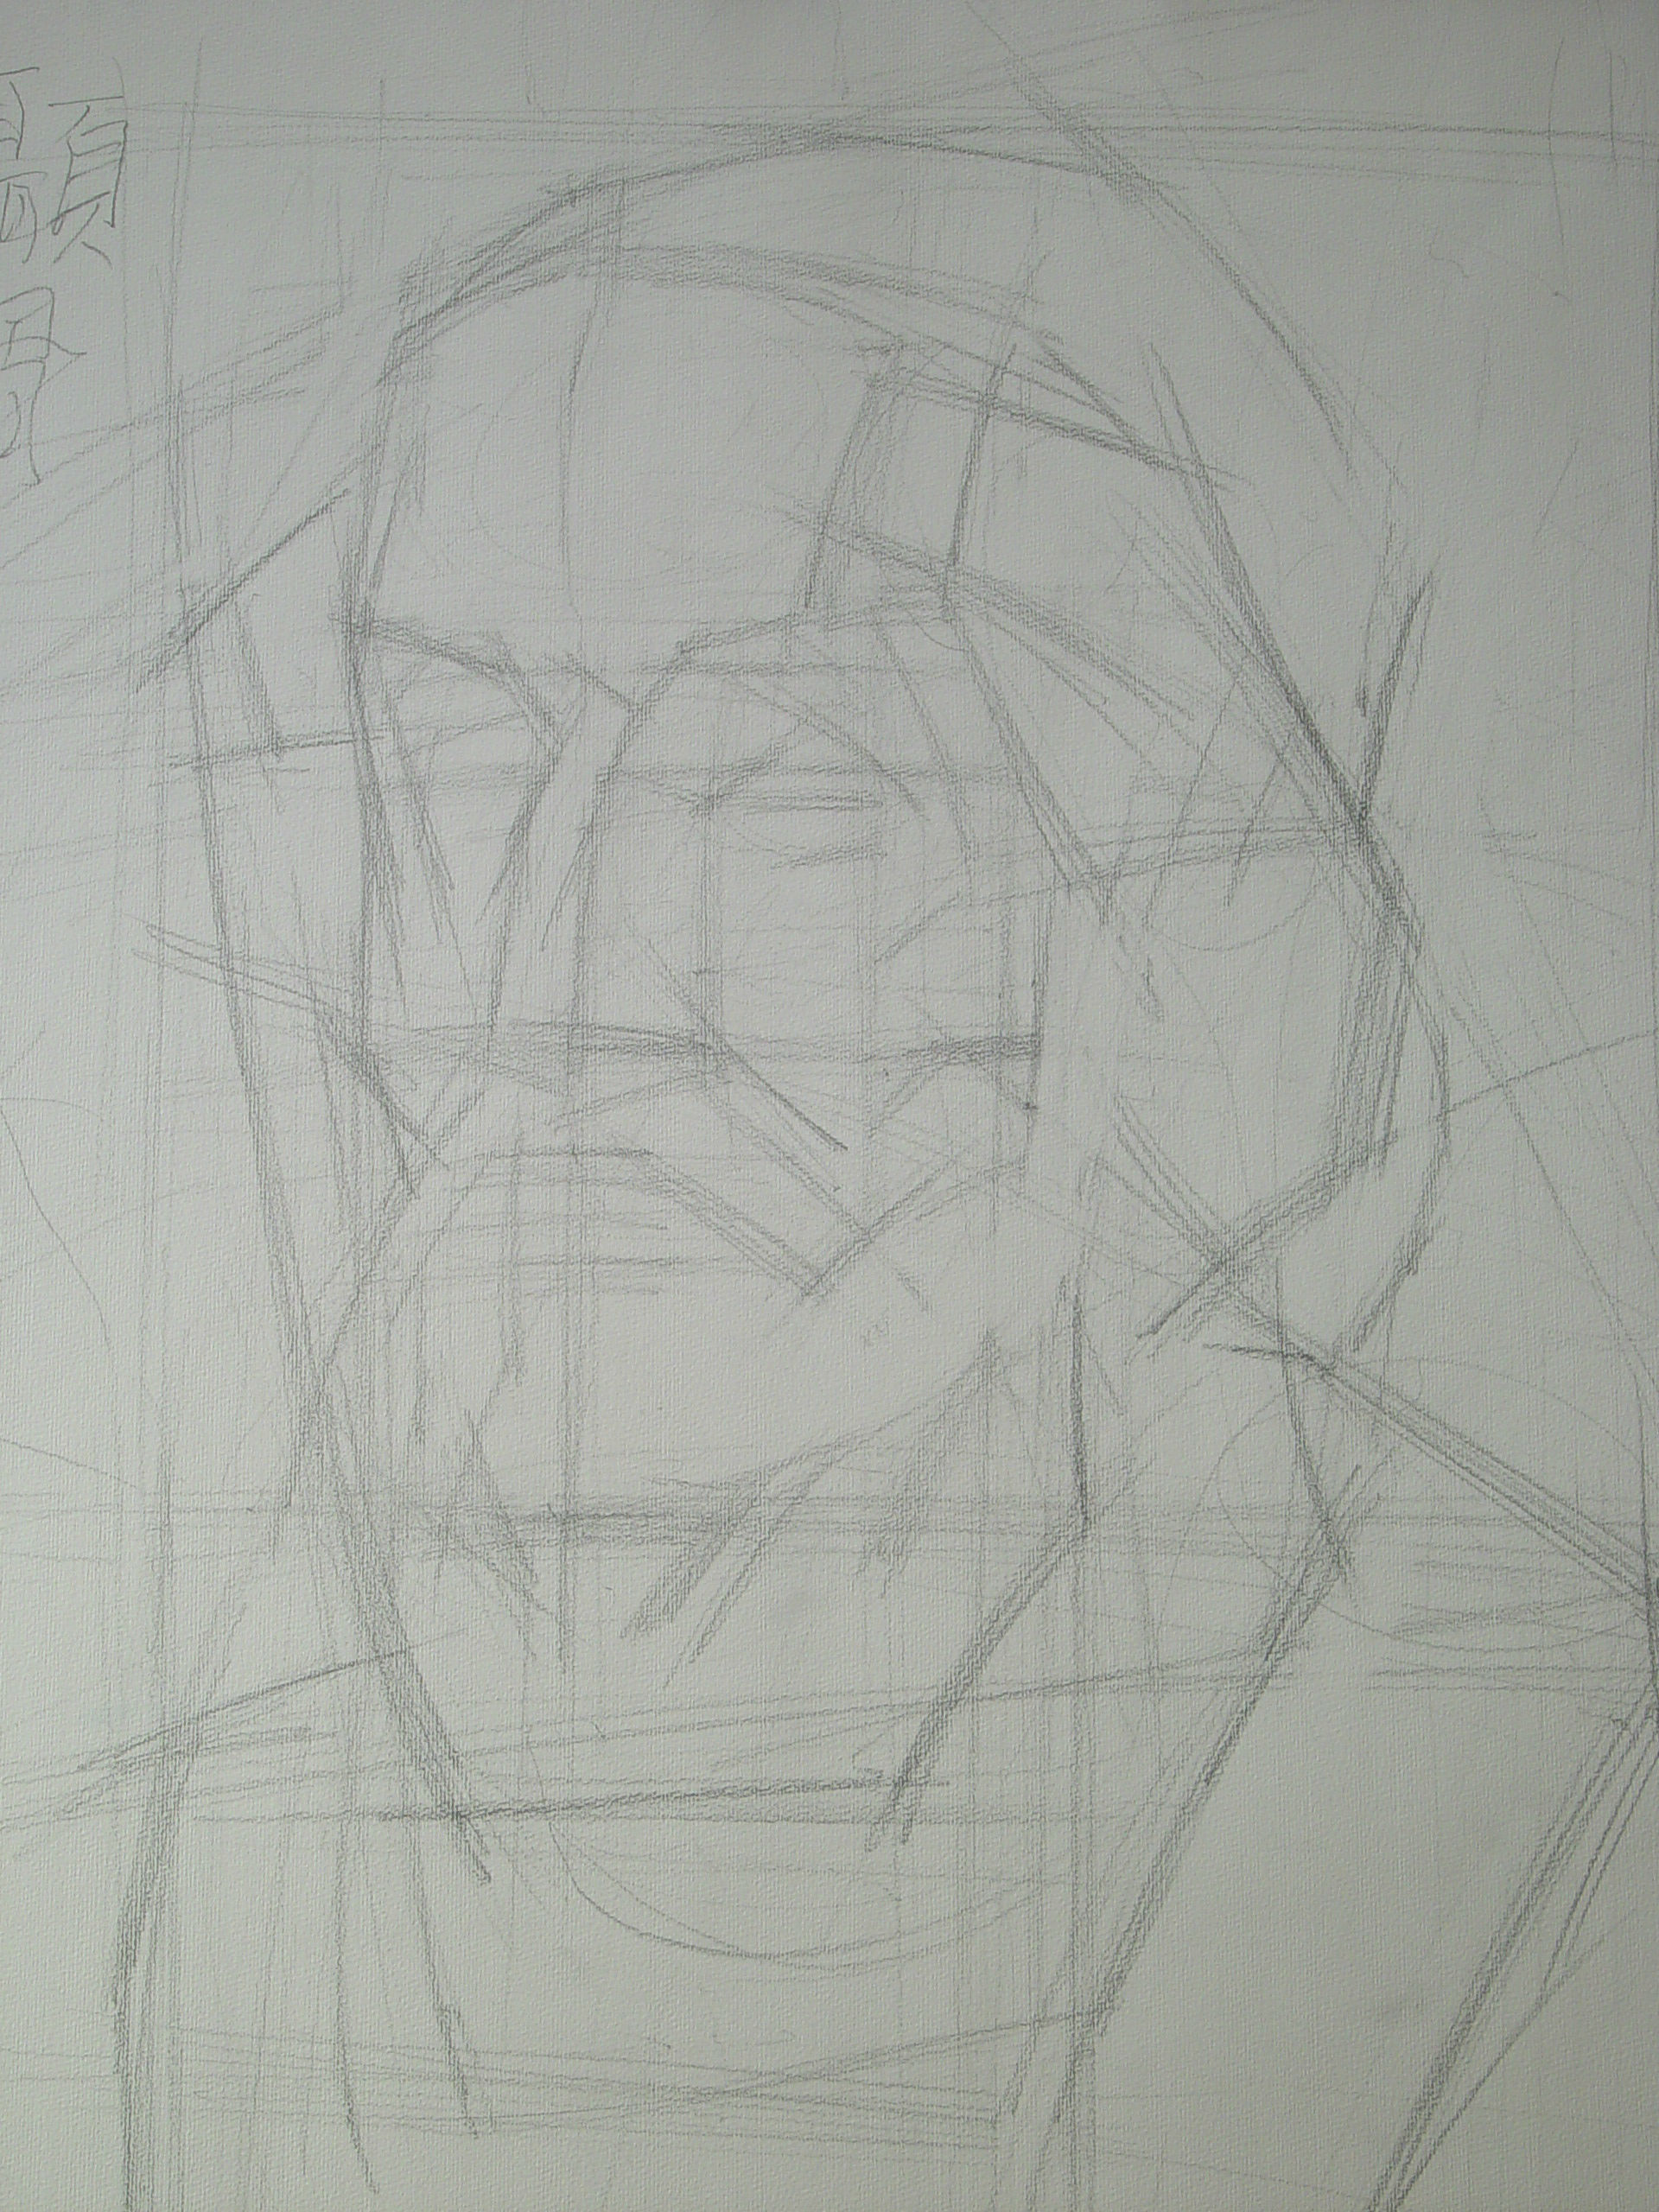
Step 2 – Planar analysis
When focusing on the facial features, distinguish between the front and sides of the face. Mark the lines at the eyes and the mouth, and then find the midline of the sculpture, located halfway between the eyebrows. After the line is drawn, the side closer to you will appear larger due to perspective. Then draw the different dimensions of the nose, its front, sides and base. Position the rest of the facial features in relations to the nose. Pay attention to the bone structures that create shadows and curves, such as the brow bone, nasal bone, cheekbone, temporal bone and mandible. Also, locate the areas where large differences in value occur.
The process may seem very abstract, but it is a key step to adopting a three-dimensional viewpoint on a piece of two-dimensional paper.
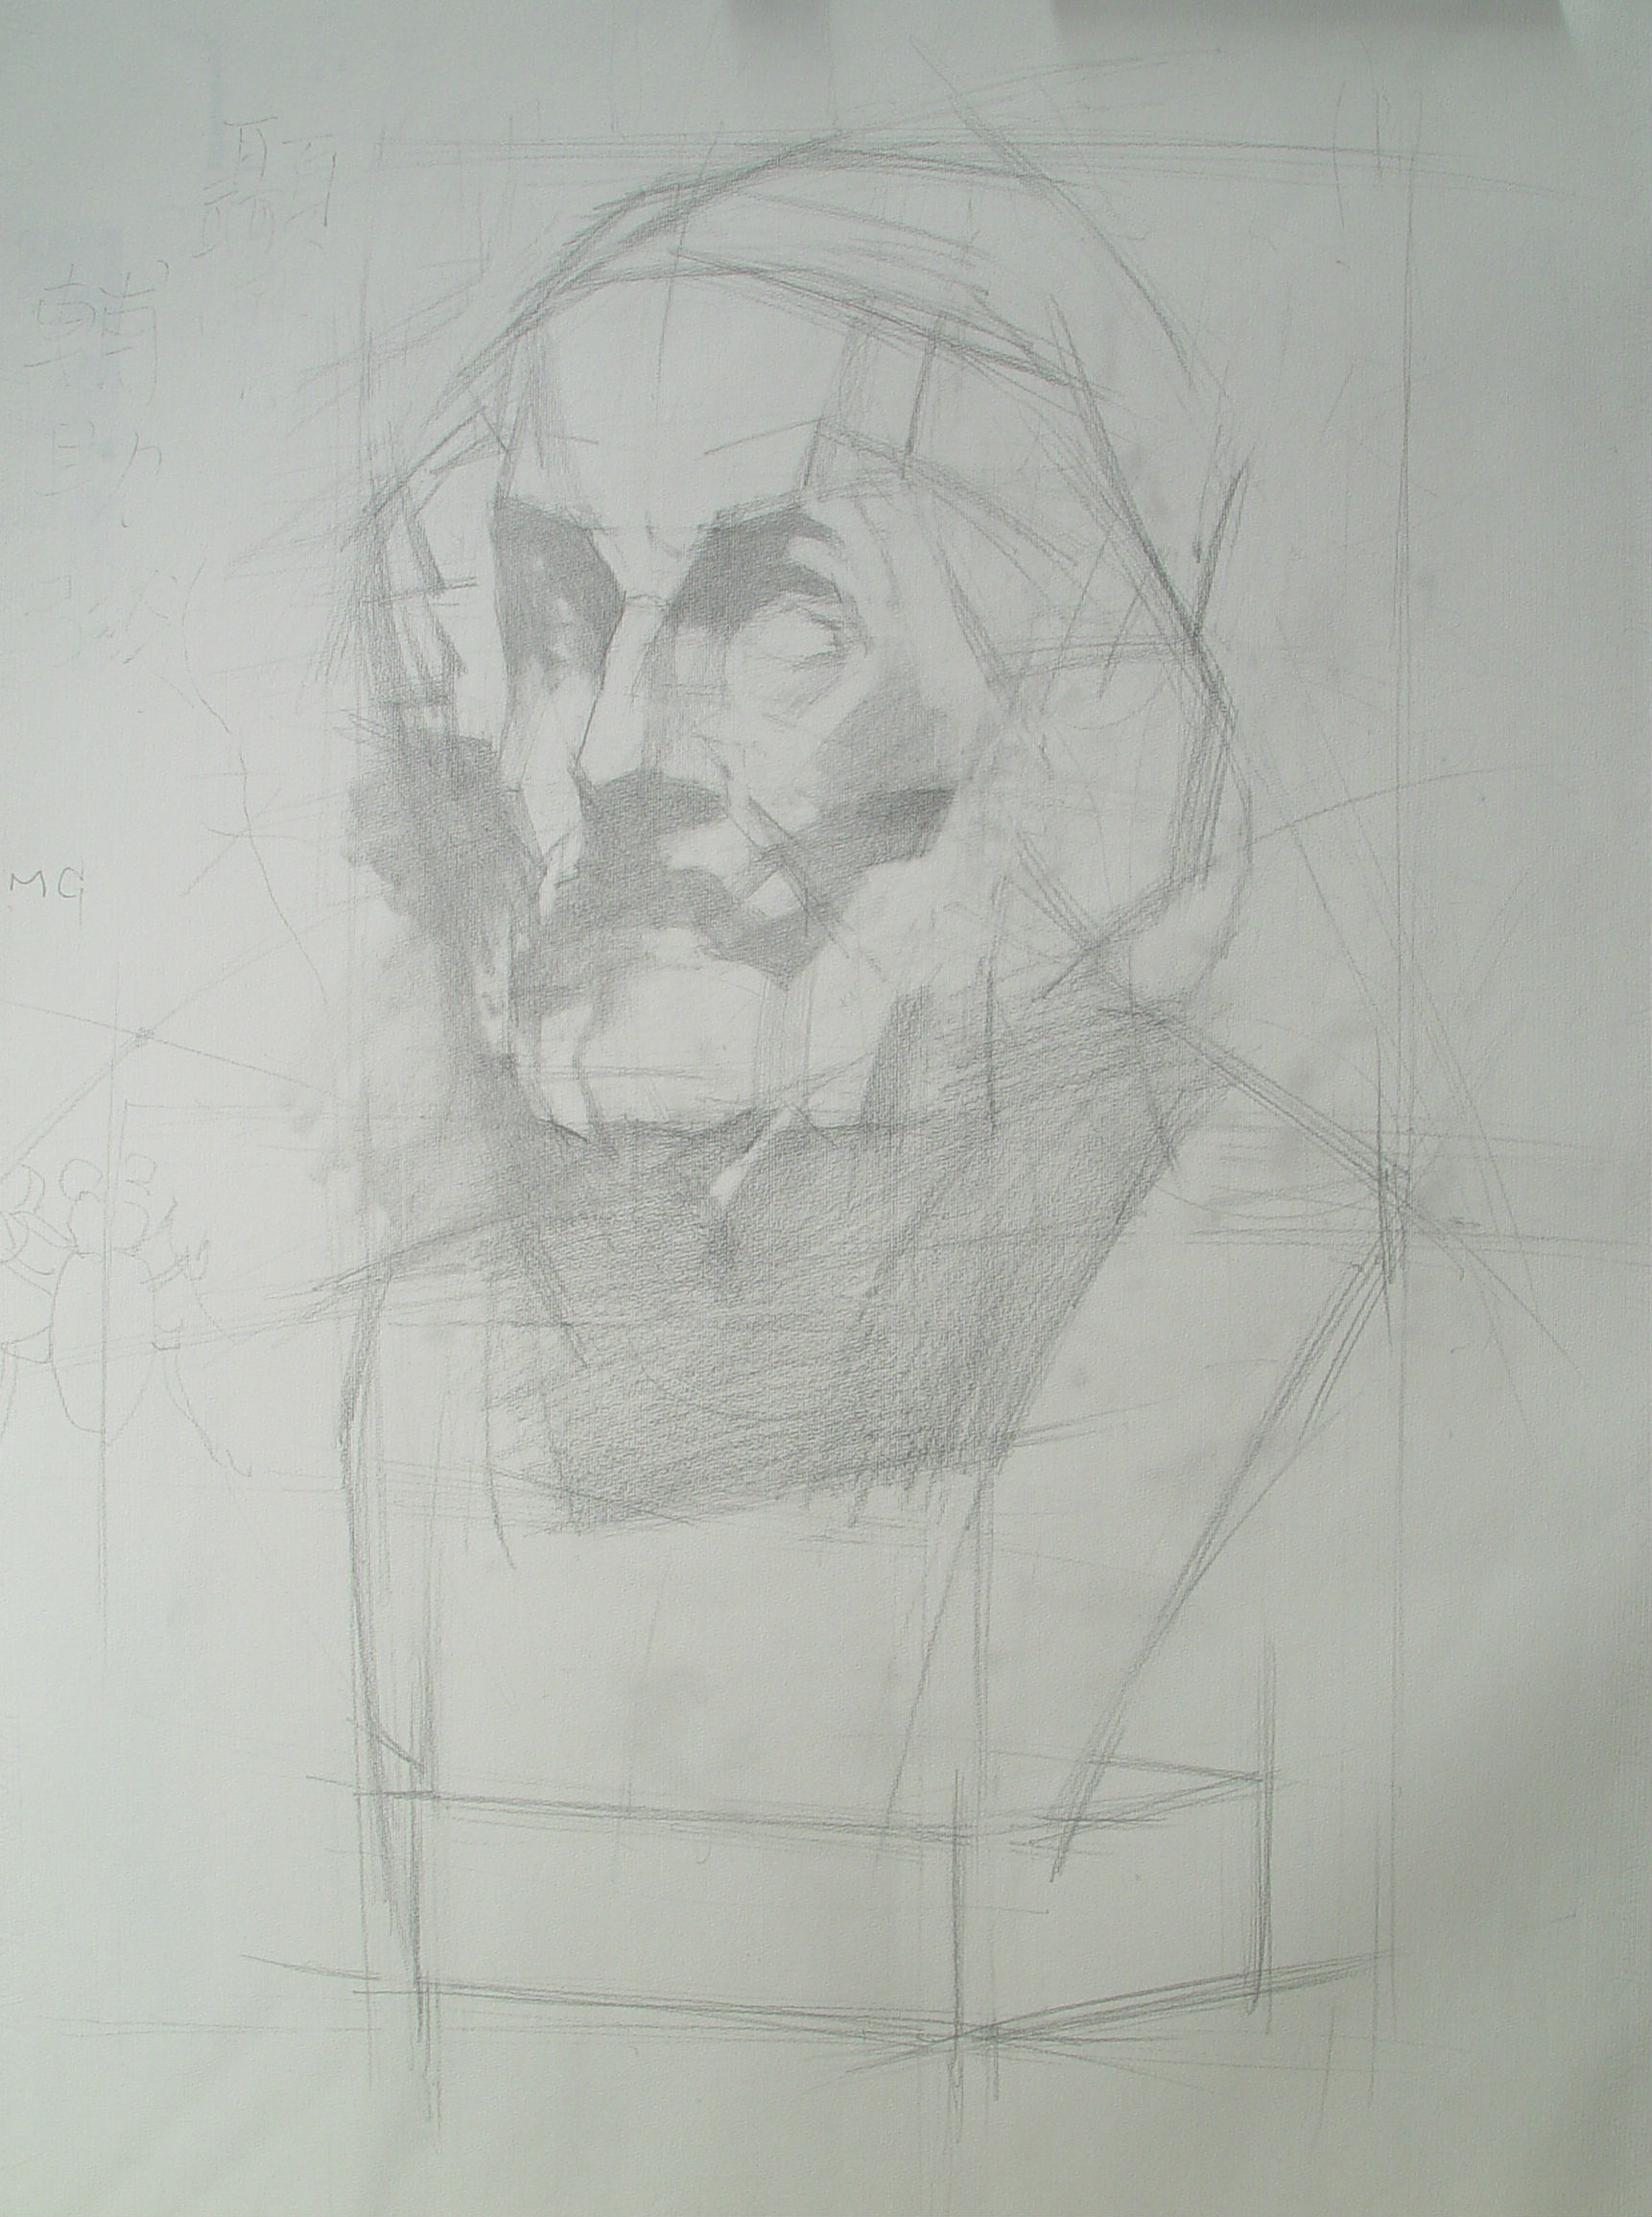
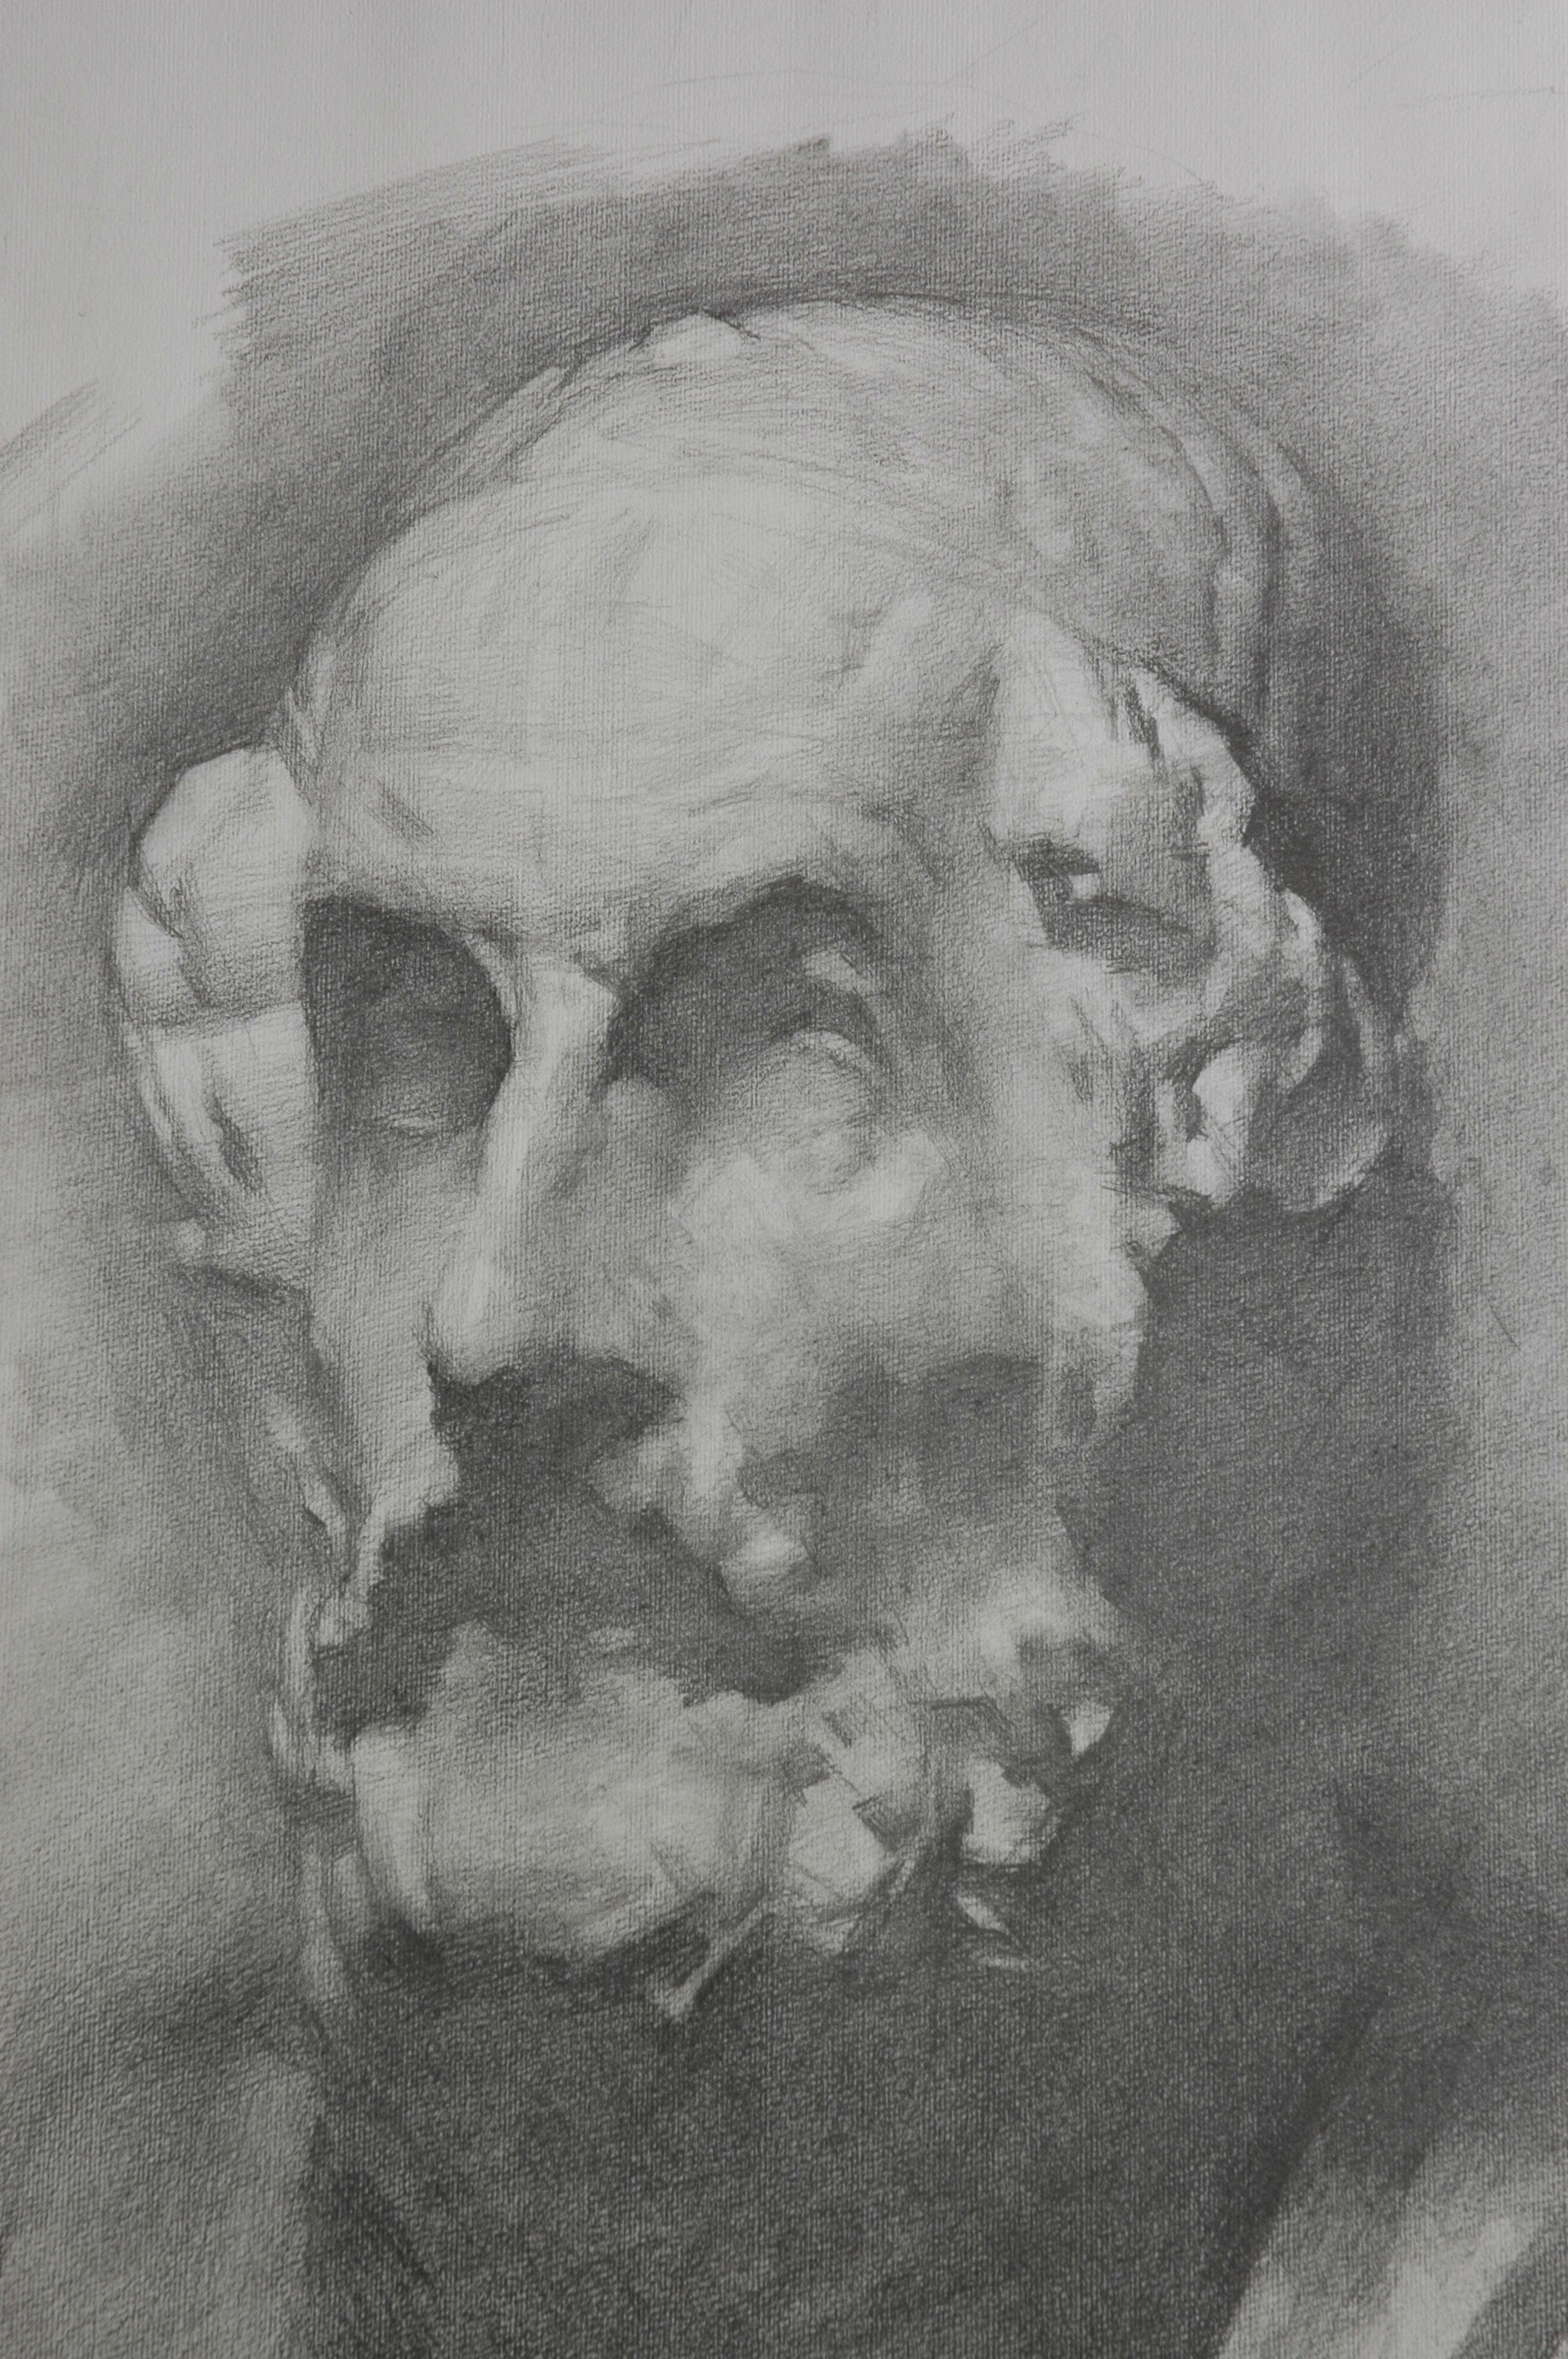
Step 3 – Add value
All objects have light, middle, and dark values when exposed to light. The block-in should include not only block-in of key parts of the plaster cast but also the dark areas. In this case, it would be the side planes of the nose, cheeks, and forehead.
The trick is to not make the ark areas too dark. Instead, I use the middle value to block in at this stage so I can easily make revisions to the shape, position, and size at later stages. Once the dark value is fixed, you’ll have difficulty changing it, so for now, keep the dark areas lighter than you want them in the final drawing.
The dark value areas should be treated as a whole at this stage. Create general, big blocks and leave out the details. In this respect, drawing works in the same way as sculpting. It is not necessary (nor is it possible) for a sculptor to carve small details during early stages.
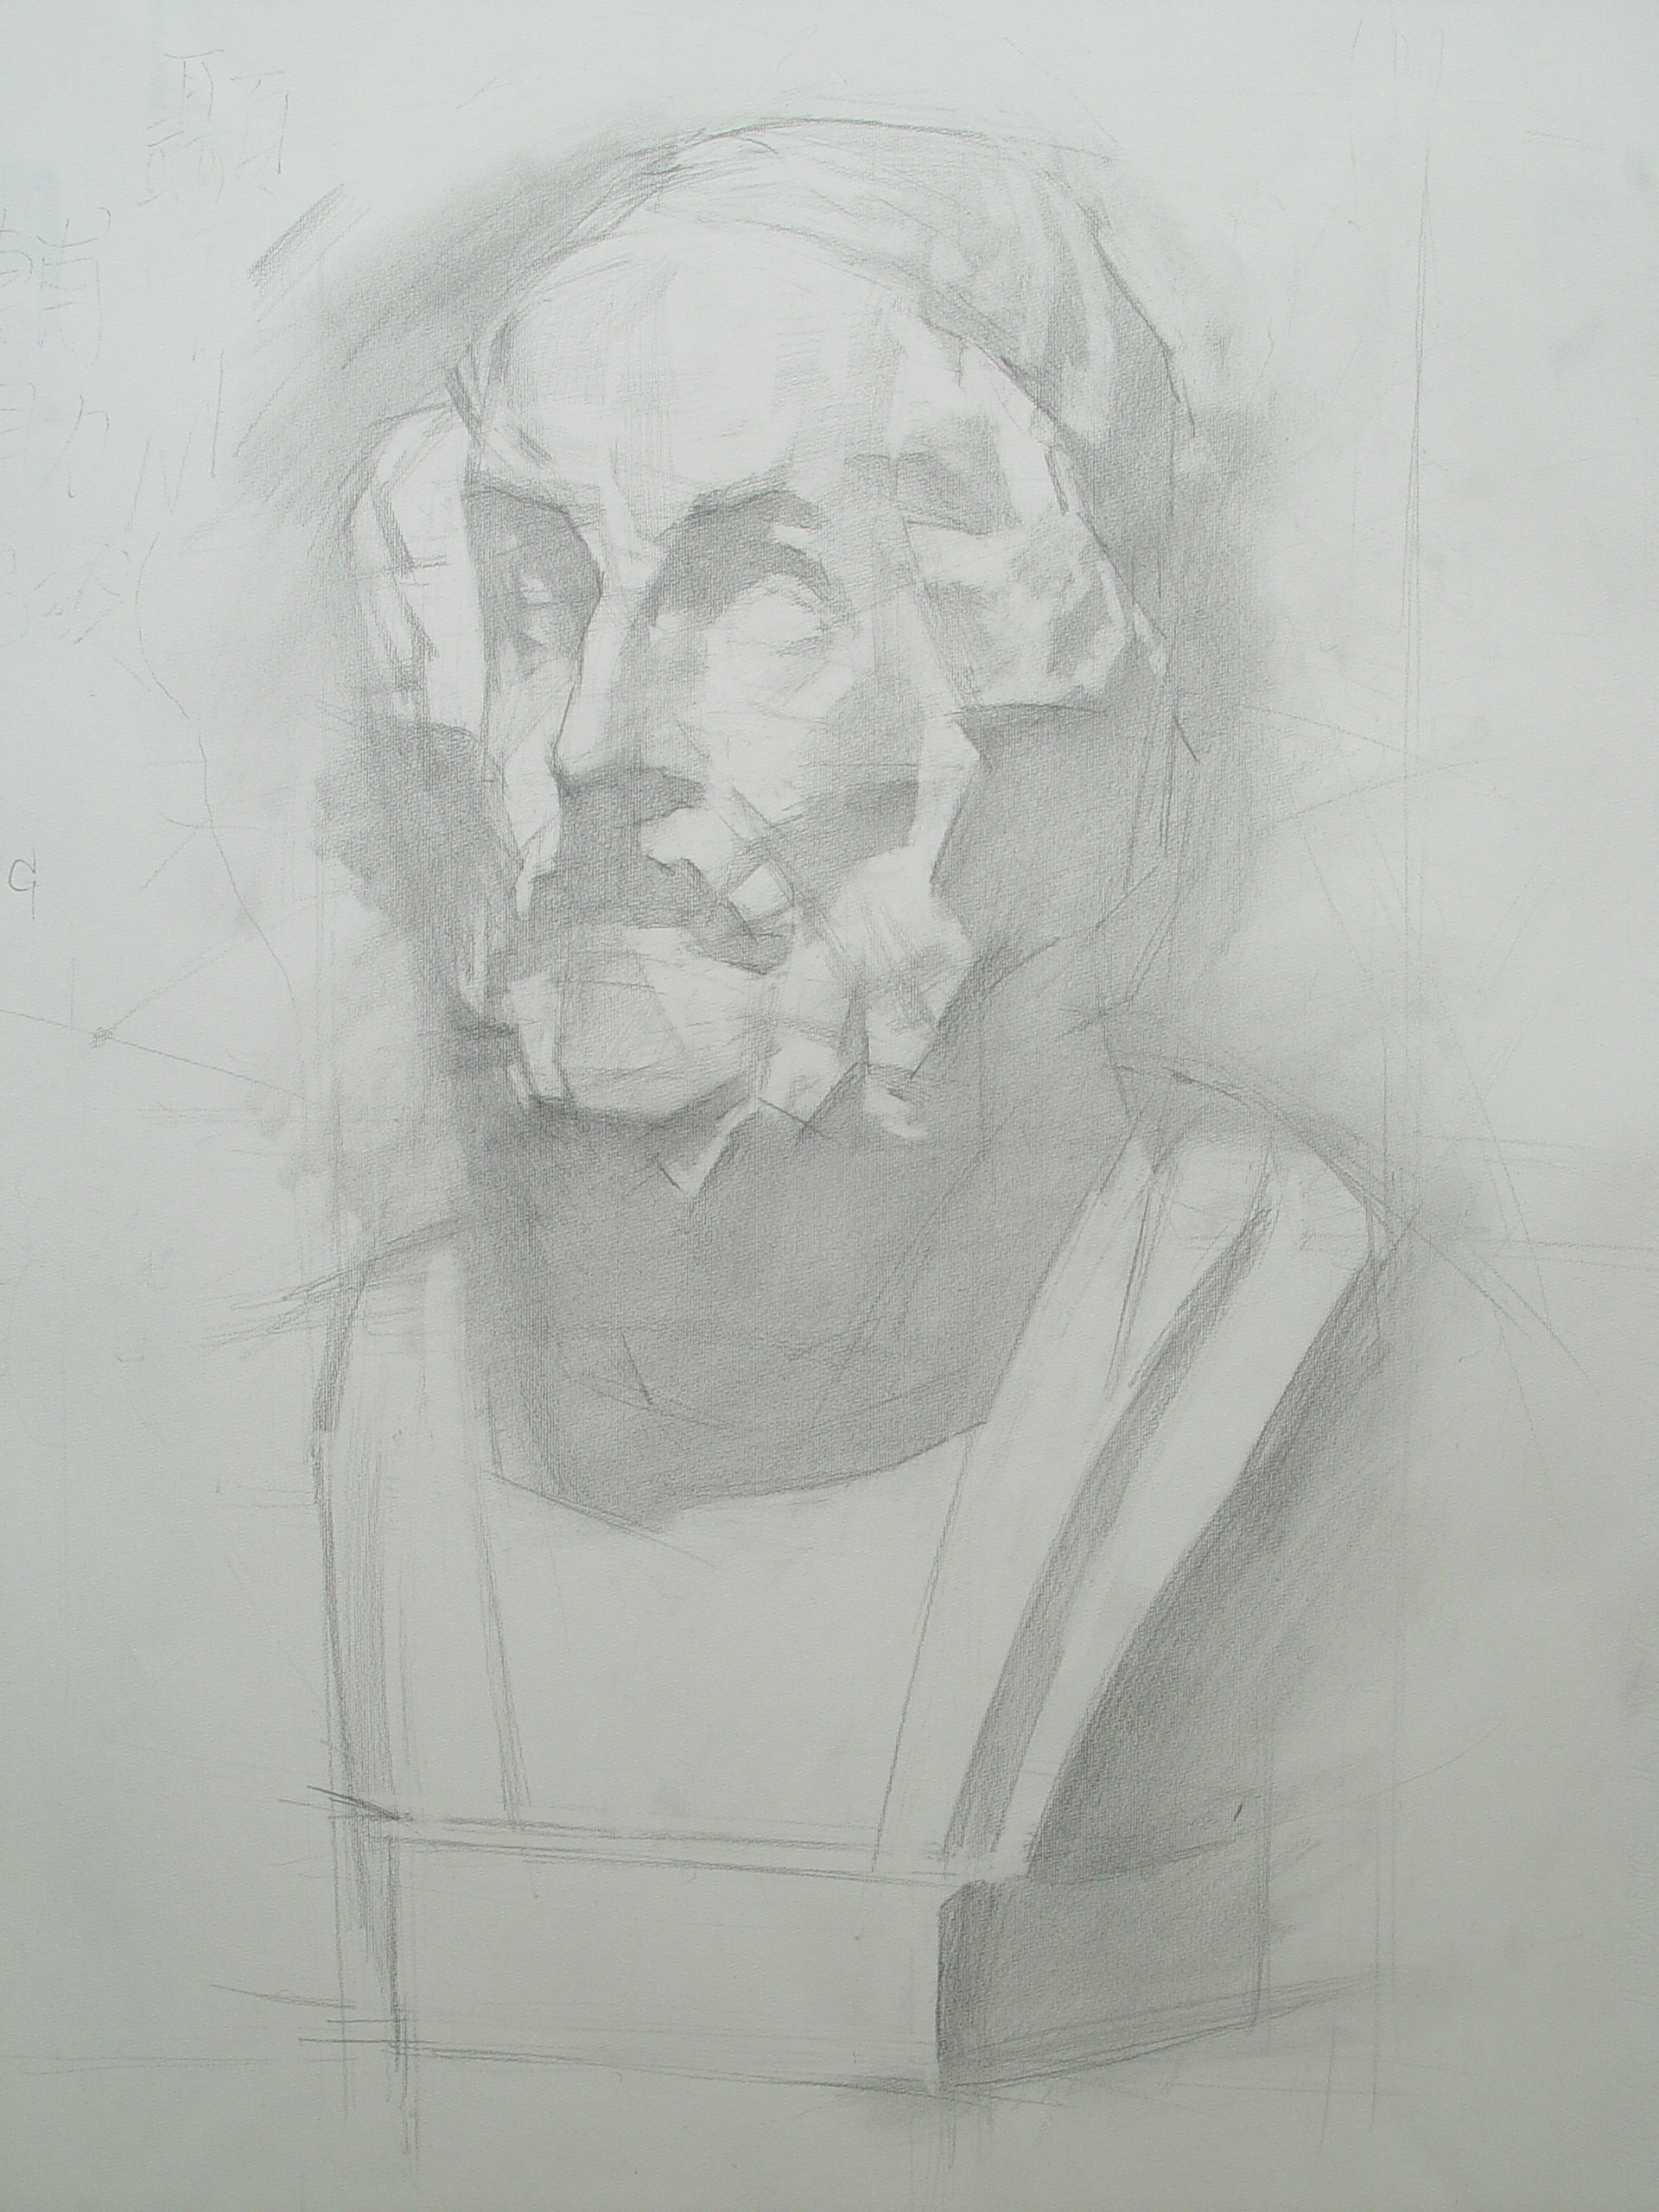
Step 4 – Continue to add value
Further define the dark areas, moving up from the back of the head to the hair, chest, and base and down to the background. These efforts create harmony, focus, depth, and, as a result, aesthetic beauty for the drawing.
It is extremely important to develop the skill to examine all parts of the drawing as a whole and not be tied down by the details. Otherwise, you may tend to see the tree but missing the forest.
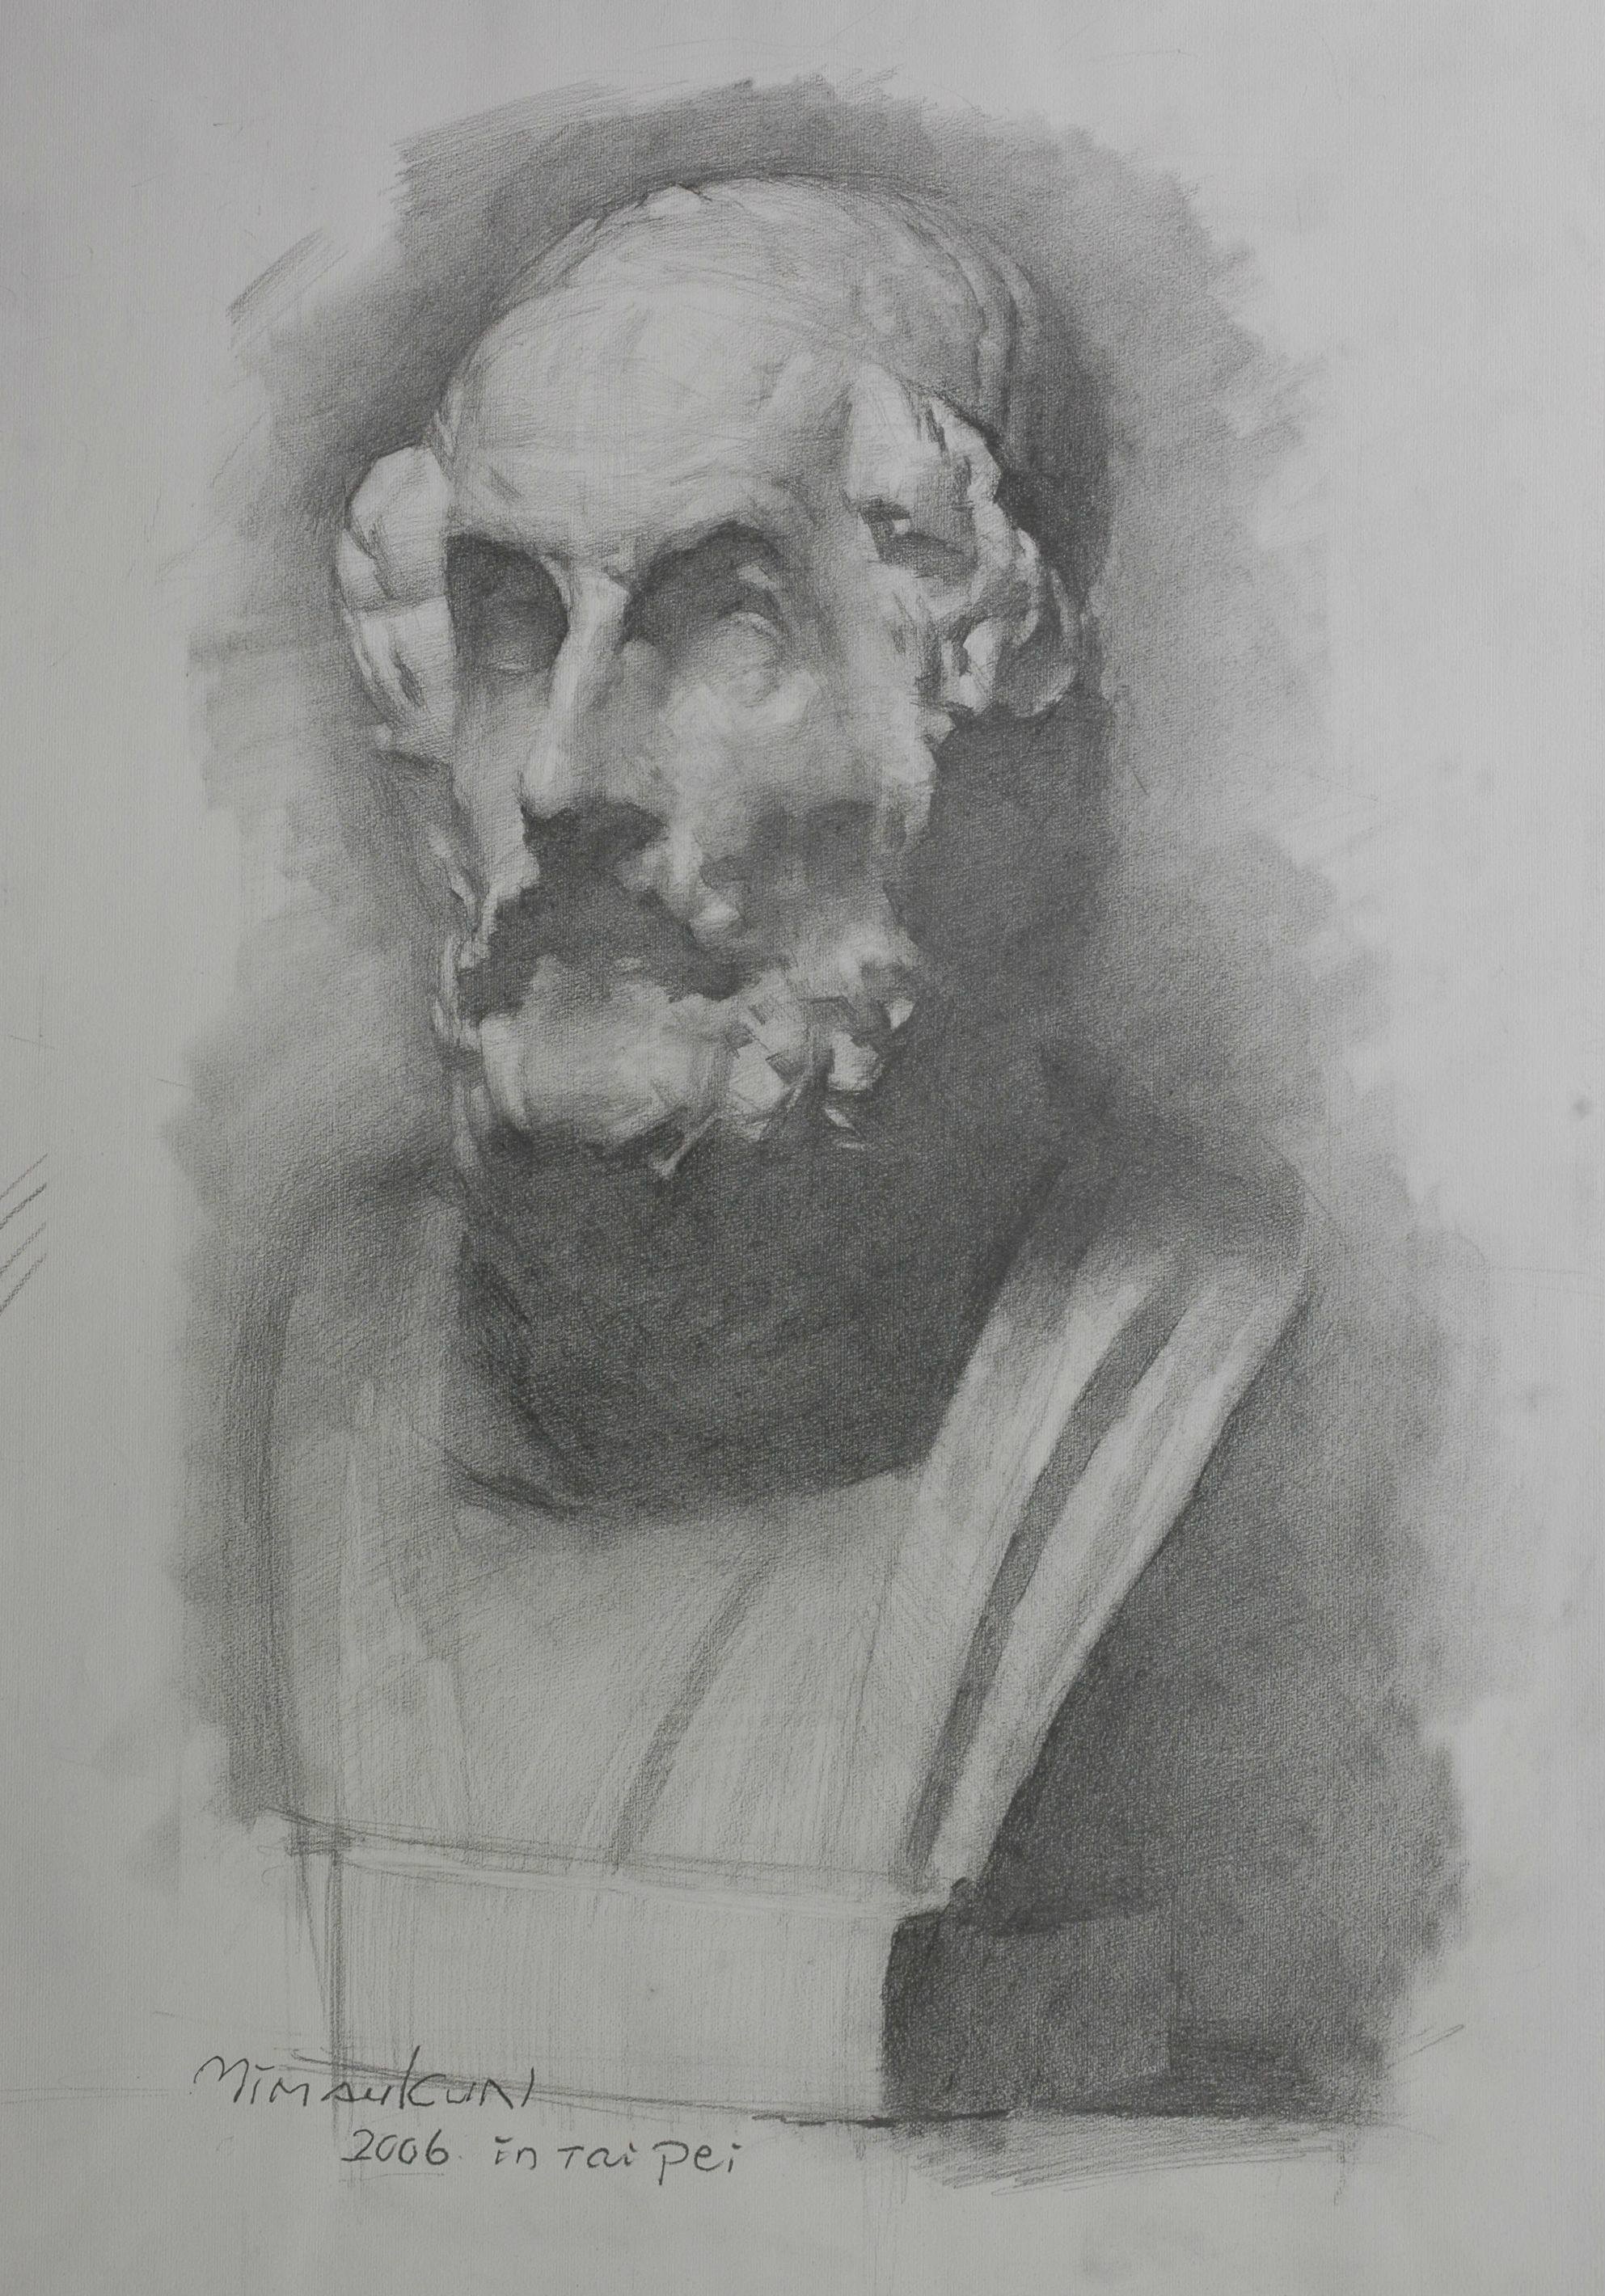
Step 5 – Re-examine perspectives
When a drawing looks inaccurate in shape, it’s often due to inaccuracy in perspectives. For example, in this drawing if Homer’s right forehead, cheek, eye and beard were any wider, the drawing would become too flat and lose its three-dimensional feel. It is important to note that the face only looks symmetrical when viewed from the front. When the sculpture’s angle is titled due to perspective, the facial features are no longer symmetrical.
Step 6 – Create details
Drawing details requires you to observe carefully and analyze thoroughly in order to accurately represent the transition in value and edges in a small area. A few things to keep in mind: First, in light areas, pay attention to transition in physical surface and form; in dark areas, pay attention to transition in value and soft edges. Second, avoid making the drawing overly smooth. Reserve the feel of “facets” in the drawing.
Step 7 – Finish up
Lastly, I reinforced the dark areas even more, including the core shadow and some borders of the plaster cast shadows. This adds to the weight and strength of the plaster cast sculpture, making the dark areas seem slightly airy.
For information about classical bust study drawing video lessons, please click here.
For information about drawing book, please click here.
For another post on classical bust study (cast drawing), please click here.
Free Drawing Guide
Want a structured introduction to Yim Mau-Kun's drawing method?
Download the free 5-Step Classical Drawing Method guide.