The portrait is a painting style that was established during the Renaissance and its earliest example was the Mona Lisa. Since then all major Western painters whose work featured people have been masters of portrait painting as well. Leonardo da Vinci, Raphael and Tiziano Vecellio, Diego Velazquez, Peter Paul Rubens, Rembrandt, and Ilya Repin were all true to form.
In the past, there were no cameras; all portraits were painted from life. Portraits painted from life are vivid, colorful and lifelike. I like painting people and have always preferred painting portraits from life as it is like conversing with life. After all, is there anything more exciting and diverse than life itself? Is not the ultimate expression of art the human form itself?
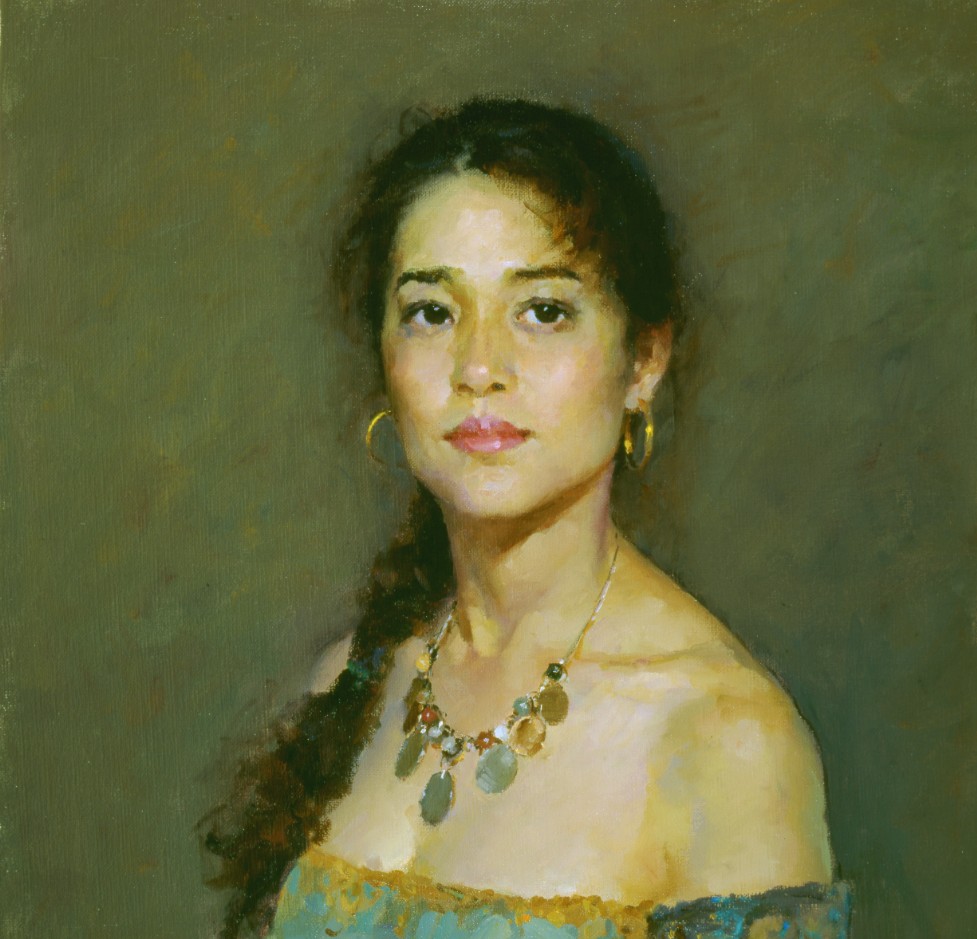
Below is my process for painting portraits from life.
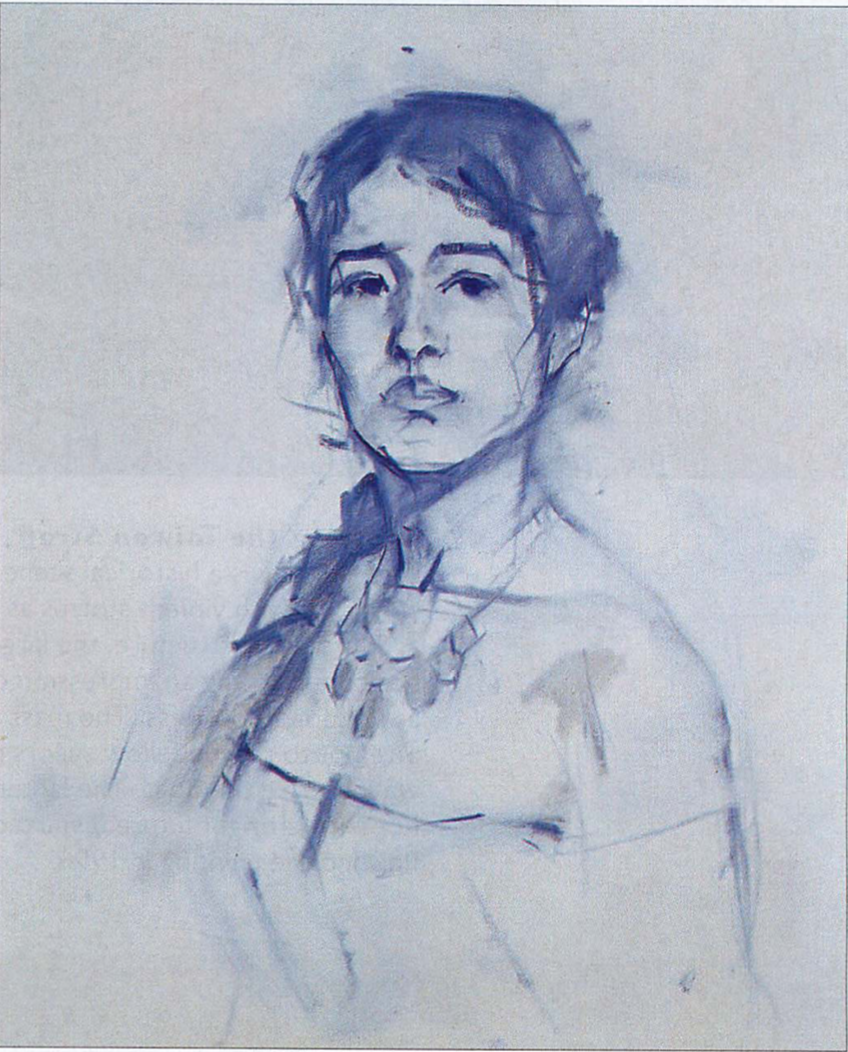
Before I block in, I usually coat the canvas with painting medium and remove excessive oil with a piece of foam. I then use ultramarine blue (without oil) to sketch and take away unwanted lines or color with a piece of foam during the block-in process.
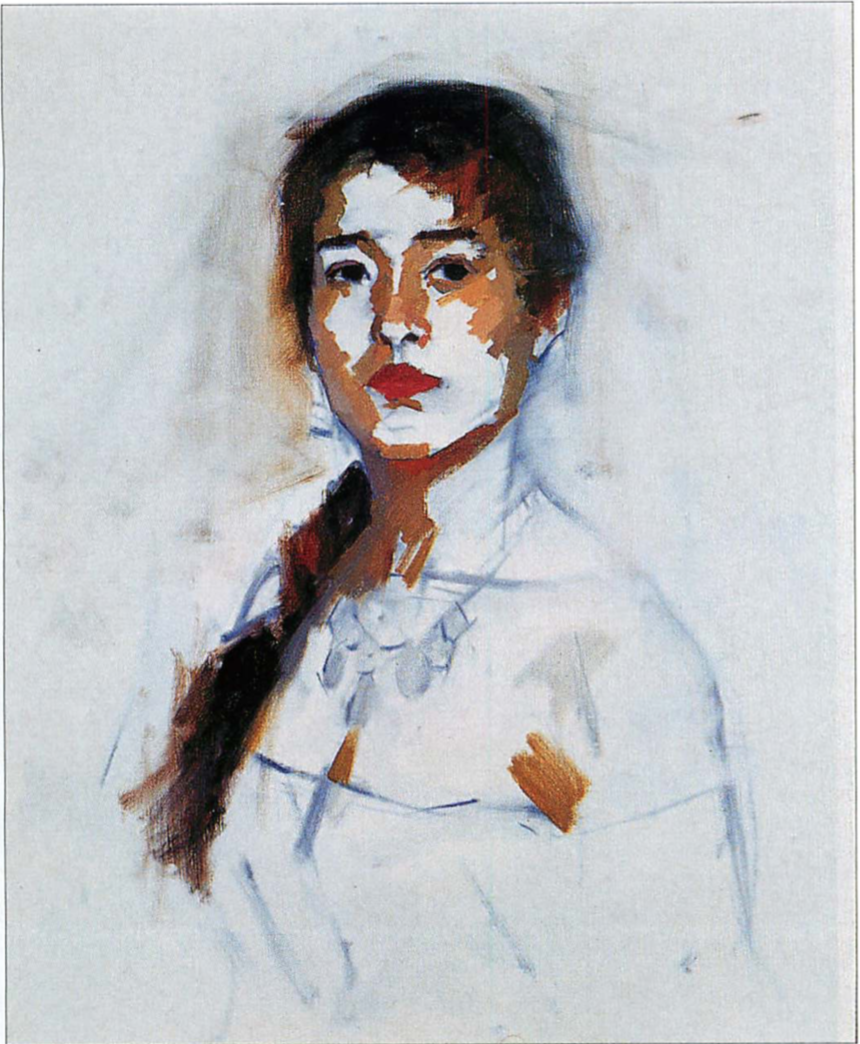 Establish dark values When I block in, I not only sketch the model’s appearance, facial features and persona but also indicate the borders of difference facets. When I apply paint, I first work on the darkest parts such as hair, eyes, eyebrows, and then the less dark areas. I don’t mix oil with paint for sketching because there is oil coating on the canvas. Sketching with paint without oil on oil-coated canvas makes the colors appear full and soft.
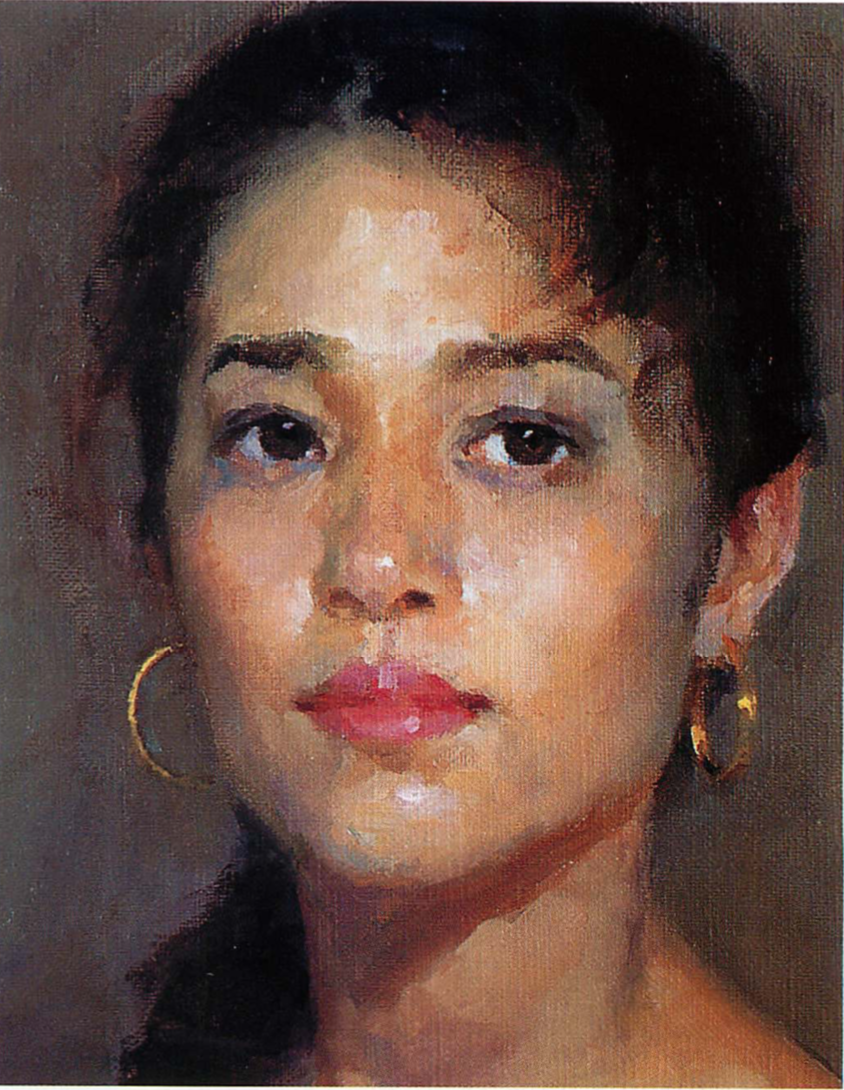 Shaping her persona The first painting session (the first day) usually lasts for three to four hours. On the following day, the paint on the canvas is slightly drier than on the first day but not completely dry, which makes the canvas most appropriate for painting details of the head and skin. When working on finer details, I generally begin with facial features, and then the areas immediately adjacent to the face and the border where the hair and the backdrop meet. Lastly I refine important parts which shape the appearance and persona of the model such as the eyes, eyebrows, and corners of the lips. In order to avoid creating an overly delicate and smooth face with excessive details, I will place some larger and definitive strokes as final touches on the face.
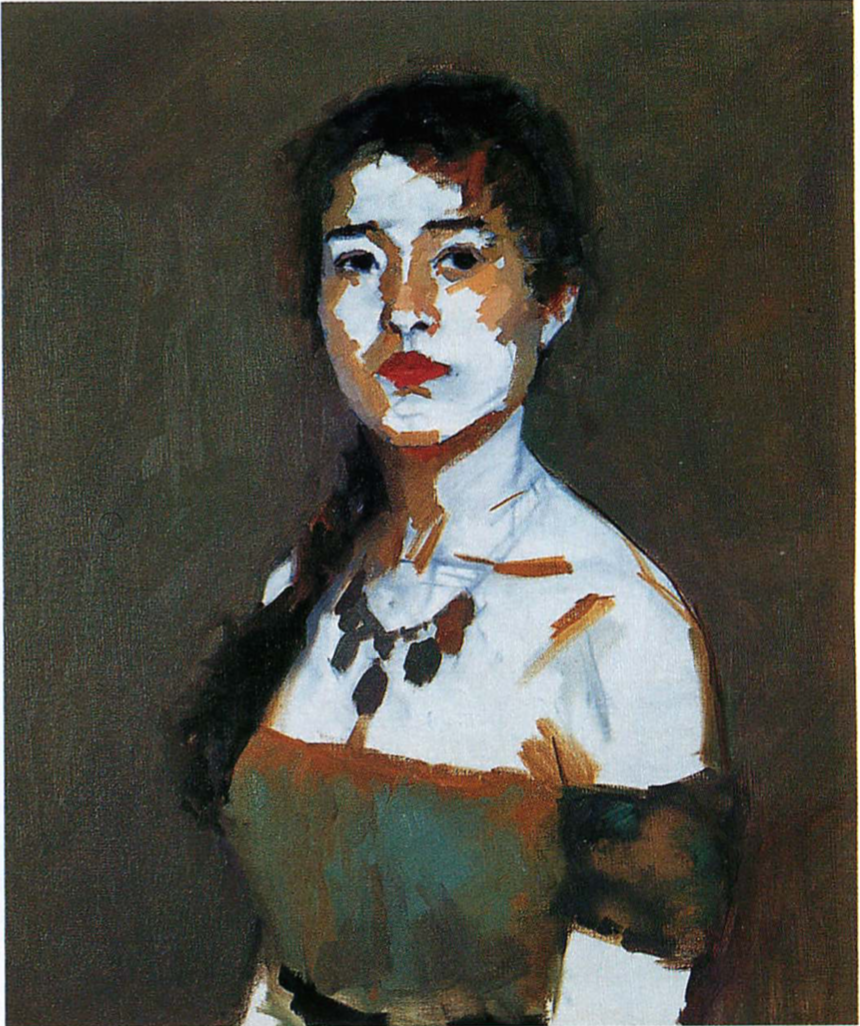
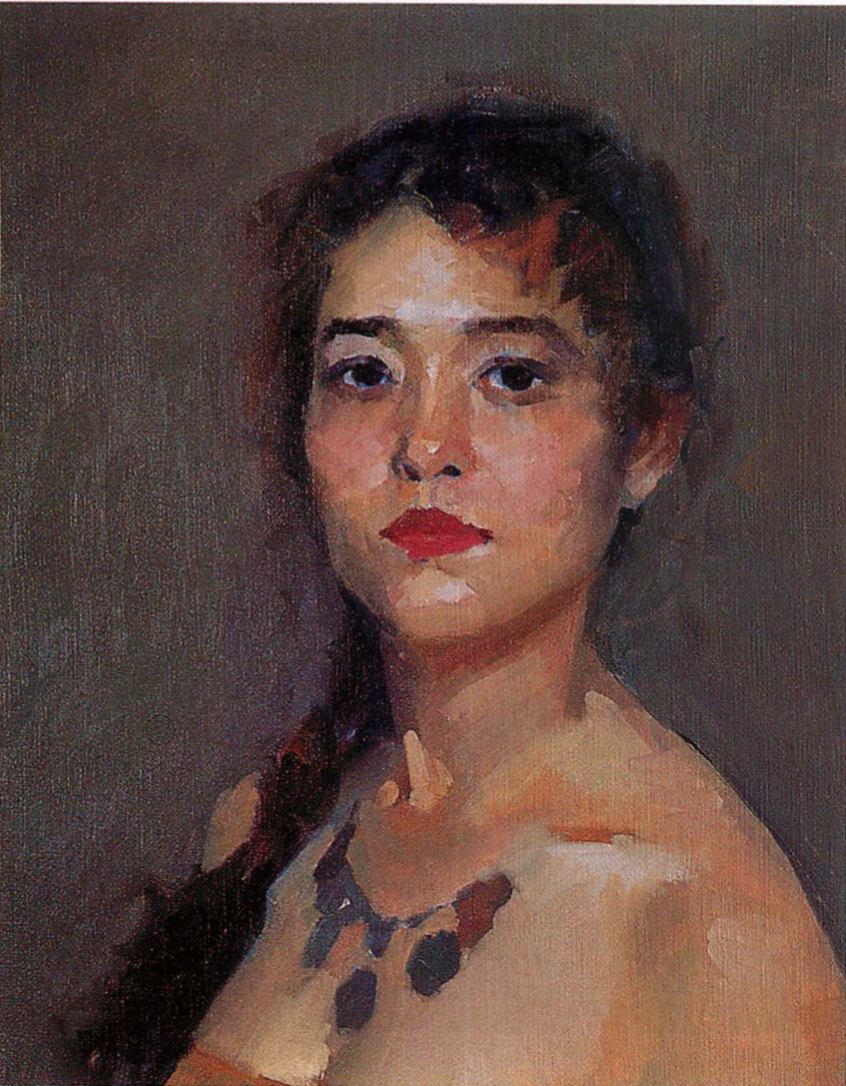 Completing the block in After finishing the backdrop, I move on to the lighter parts of the figure’s head, chest and arms and apply paint to the structural facets distinguished during the block-in. At this stage, I’m not very precise about details and move the brush quickly. The paint used at this stage is still not mixed with oil. When I mix paint for lighter parts, I first mix two to three basic colors. Then I mix ultramarine, purple and green with white or light gray and place them next to the basic colors for creating warm or cool tones later on.
Except for oil painting portrait sketches and portraits with light backdrops, I generally apply paint with a large bristle brush to the backdrop and any other parts with colors darker than the skin right after I finish sketching. When working on the backdrop, I prefer to mix plenty of paint to ensure there is not only enough paint for the backdrop but also paint left for revision at a later stage of the painting process. Taking care of the backdrop before painting the skin gives me a better idea of the tone of the skin color and helps me avoid creating skin color that’s too light or too dark.
After finishing the backdrop, I move on to the lighter parts of the figure’s head, chest and arms and apply paint to the structural facets distinguished during the block-in. At this stage, I’m not very precise about details and move the brush quickly. The paint used at this stage is still not mixed with oil.
When I mix paint for lighter parts, I first mix two to three basic colors. Then I mix ultramarine, purple and green with white or light gray and place them next to the basic colors for creating warm or cool tones later on.
The first painting session (the first day) usually lasts for three to four hours. On the following day, the paint on the canvas is slightly drier than on the first day but not completely dry, which makes the canvas most appropriate for painting details of the head and skin. When working on finer details, I generally begin with facial features, and then the areas immediately adjacent to the face and the border where the hair and the backdrop meet. Lastly I refine important parts which shape the appearance and persona of the model such as the eyes, eyebrows, and corners of the lips. In order to avoid creating an overly delicate and smooth face with excessive details, I will place some larger and definitive strokes as final touches on the face.
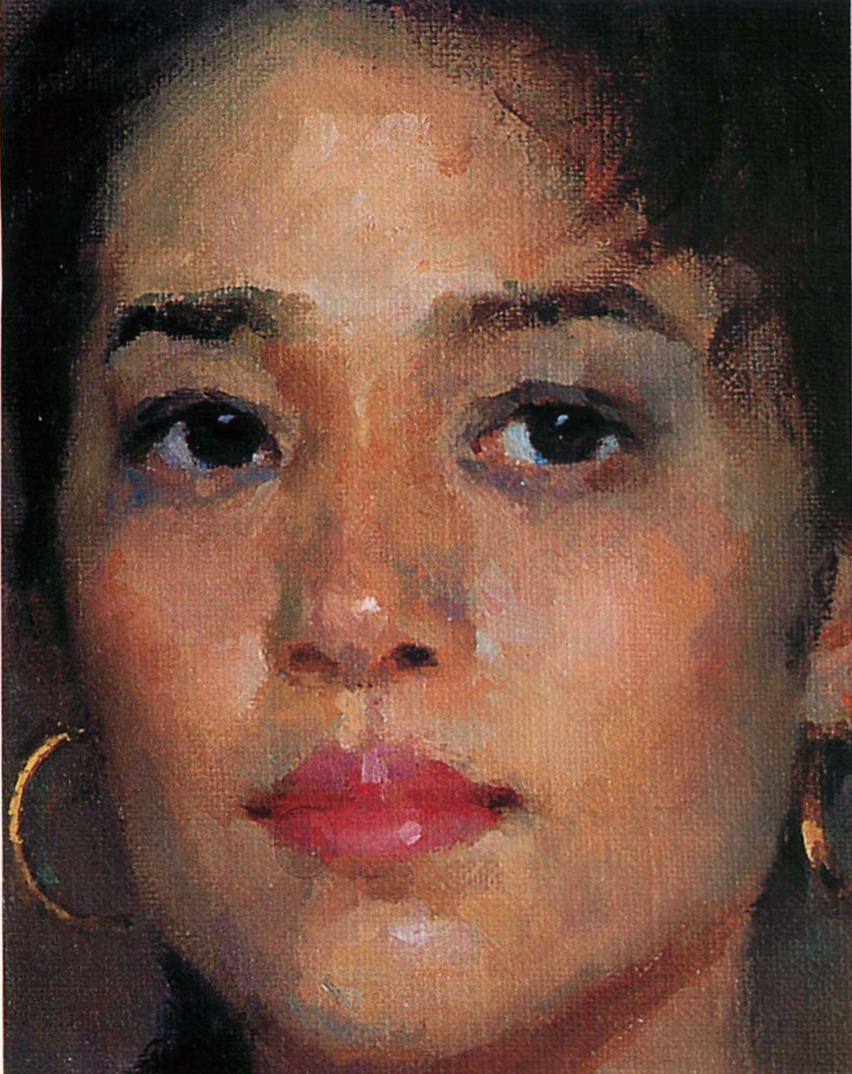 Controlling textures and edges
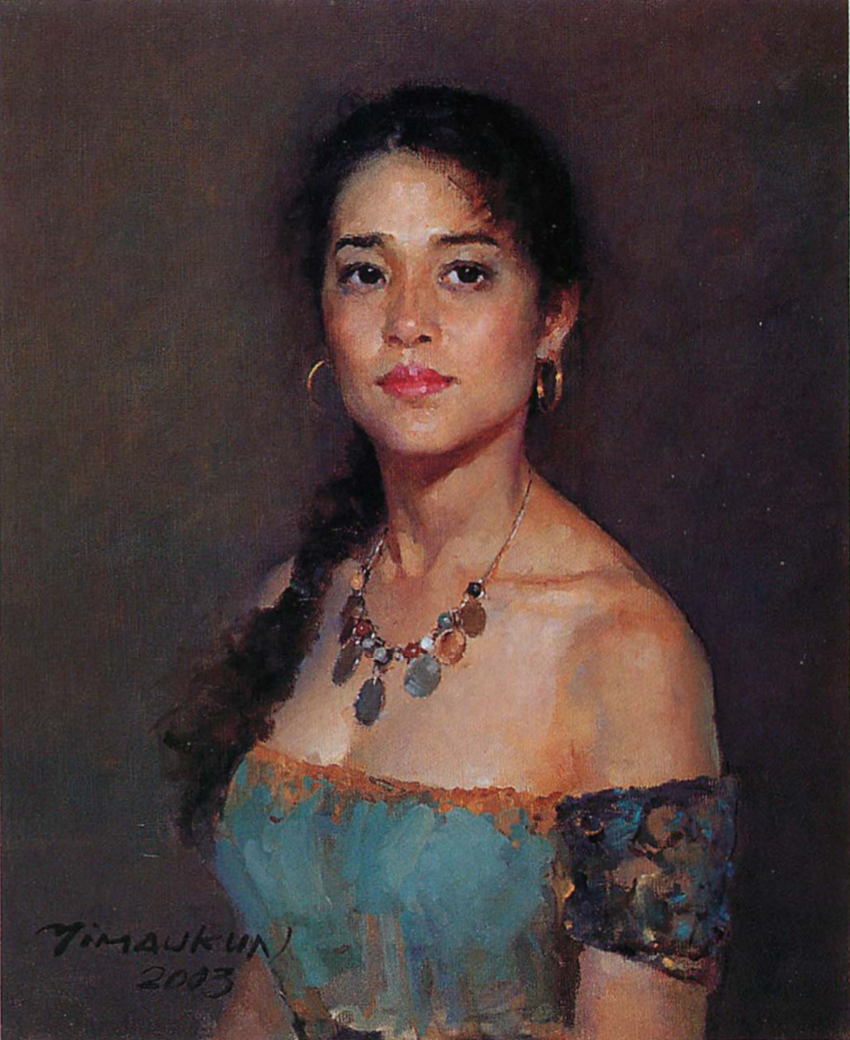
After finishing painting the head, I move on to decorative accessories. If the accessory is small, I will switch to use smaller brushes. When painting the accessory, I use brush strokes, although small, to create some texture to maintain the aesthetic value of the portrayal of the accessory.
Finally, I go back to the edge control of the hair, clothes and backdrop. The backdrop is almost dry at this stage. So I apply a thin layer of painting medium to the backdrop and use a rather large but soft brush to redefine the soft and hard edges of the hair and backdrop.
After the model leaves, I examine the painting with oil painting standards, refine the proportion of the figure and perspective of the painting and adjust discordant colors and details as a final step to complete the painting.
Note: This is is part of feature article, “A Language of Color,” in the August 2004 issue of International Artist.
For information on oil portrait video lessons, please click here.

